Shoe Modifications

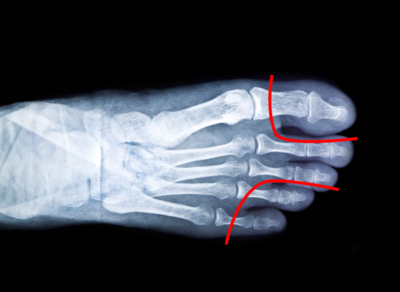
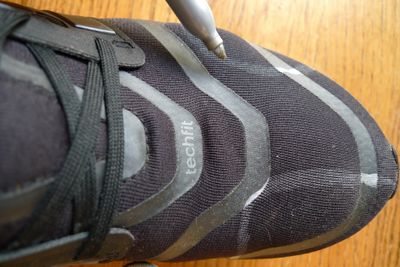
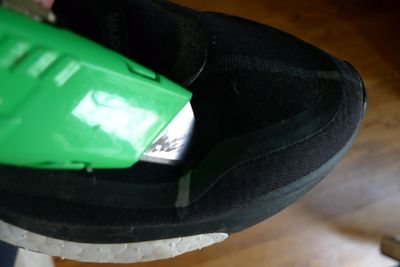
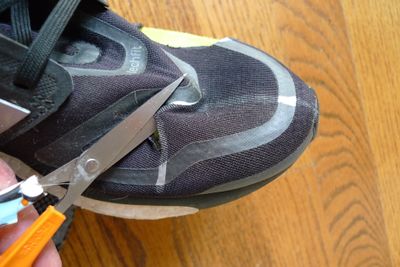
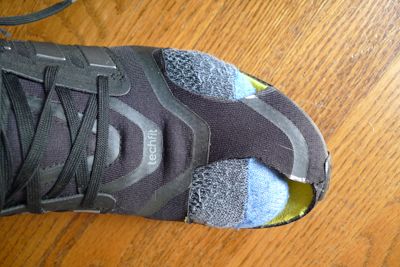
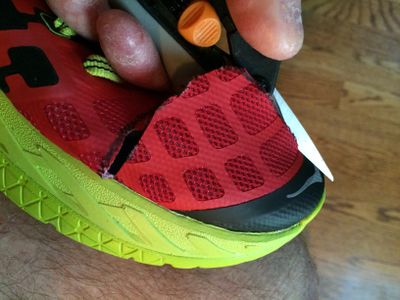
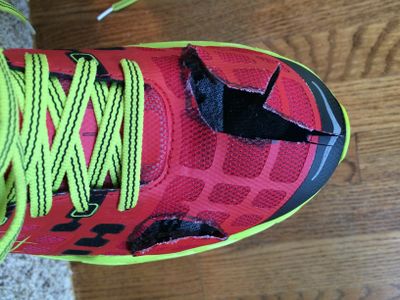
I cut open the toe box of nearly every shoe I run in to prevent blisters and to improve comfort. I started doing this to prevent blisters on ultramarathons, but over time I found that an open toe box allows my feet to move more naturally. When you run, your toes will tend to splay out at toe off, something that is inhibited by most running shoes. Of course, most people are reluctant to take a knife to their expensive running shoes, so I recommend trying get on an older pair of shoes that are close to the end of their life. This allows you to experiment with relatively little consequence. While cutting open the toe box can dramatically improve your comfort, there are limits to what it can do. If the toe box is too small, then your feet will hang over the edge of the midsole. A common concern with cutting open the toe box is getting debris into your shoe. My experience is that this is only a problem when walking, or running through undergrowth. It's extremely rare for me to get something in my shoes while running. Running through boggy ground is far more of an issue, but I have a fix for this below.
Contents
1 Why Cut Open the Toe Box?
There are several reasons for cutting open the toe box, from simple blisters, to the prevention of bunions and plantar fasciitis.
1.1 Blisters
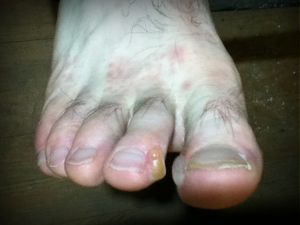
I've worked on many runners' feet and found that the traditional shoe shape causes blisters between the toes. This is noticeable in Hoka shoes, but it occurs in others. Wearing toe socks like Injinji can help reduce the friction between the toes, as can taping the toes. Sadly, this also reduces the room in the toe box as it pushes the toes further apart, thus increasing the pressure. Cutting open the toe box relieves the pressure and I've not had a toe blister issue with an open toe box.
1.2 Bunions
A bunion (hallux valgus) is a deformity of the joint between the foot and the big toe, where the toe is bent towards the other toes. Shoes that constrict the toes are believed to be a trigger for bunions, and the rise of pointed shoes in the late medieval period coincides with bunions in the skeletal remains from that time[1]. Though bunions occur only in shod populations, only a subset suffer from the problem, suggesting there may be other causal factors[2][3]. Cutting open the toe box relieves most of the pressure that constricts the toes.
1.3 Plantar Fasciitis
The plantar fascia are thick bands of connective tissue that support the arch of your foot. These bands can become painful, a condition called Plantar Fasciitis, or just PF. Plantar Fasciitis is common, with an estimate of 10% of the population suffering at some point[4]. The plantar fascia supports the foot, forming a link at the bottom of the triangle of bones that are the arch of the foot (see the image below.) The tension on your plantar fascia depends on the position of your toes. If your toes are raised up, this tensions the plantar fascia as shown below, something referred to as the windlass mechanism[5]. This windlass mechanism also shortens your foot, raising the height of your arch, and both mechanisms strengthen your foot. Wearing shoes can prevent you raising your toes. This inhibition of the windlass mechanism may be a cause of plantar fasciitis[6]. / [5] [4] [6] [[File:Plantar Bewegung.png|center|thumb|300px|
2 What About Morton's Toe?
Morton's toe is where the big toe appears shorter than normal, as shown below. While a traditional running shoe has more room for Morton's toe, it still lack the room for the toes to spread and flex, so modification is beneficial. File:Mortons Toe.jpg
3 What About Barefoot or Sandals?
It's often suggested to me that rather than cutting open my shoes, I should run barefoot or in sandals. This is a bit like suggesting that instead of opening the windows in your car, you should ride a motorbike. Cutting open a running shoe gives you the benefits of the cushioning, protection, and grip of a running shoe, without the problems. A correctly designed shoe wouldn't need cutting open. It would have a toe box wide enough for your toes to splay, which even Altra shoes lack. It would also have enough height for your toes to flex and strengthen the foot, which no shoe does. A properly designed shoe would look quite strange, and probably wouldn't sell, so it will be a long time coming.
4 How to Make the Cut
5 Modifying for Boggy Ground
Running through boggy ground isn't practical with cut open shoes. The mud gets into the shoe and is hard to remove. The alternative is to cut the shoe, leaving most of the upper in place, then tape over the gaps. I'll add more details and photos as I perfect this technique. I've found the best approach is to use KT Tape glued down with "fantastic elastic" glue. Pair Ups describes the use of KT Tape and glue nicely.
6 Downsides
There are some downsides to cutting open the toe box.
- You can't return shoes you've cut open. In fact, you can't even give them away!
- It's rather disconcerting to cut open shoes you've just paid a lot of money for.
- The shoes can rip open because of the extra stress of the cuts. However, in the thousands of miles I've been running in shoes cut open, I've only had two pairs tear and then only after a lot of miles.
- You can get debris into the shoe. I've only found this to be an issue when walking, not running unless I'm running through long grass.
7 The De-Snowshoe Modification
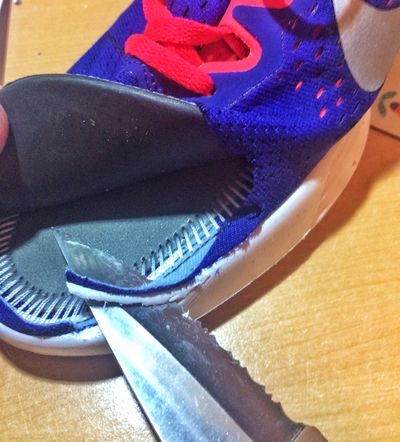
There is a tendency for Maximalist shoes to not only have a thicker sole, but to also extend the sole outwards. This means the contact patch of the shoe is much wider than your foot, almost like a snowshoe. This extension can create torsional (twisting) forces on your ankle if your foot lands on the edge first. I've found it's worth trimming away this excess, as shown in the image below. [[File:Clayton200 Snowshoe.jpg|none|thumb|400px|The Hoka Clayton with the sides of the sole trimmed to remove the "snowshoe".]]
8 References
- ↑ S.A. Mays, Paleopathological study of hallux valgus, American Journal of Physical Anthropology, volume 126, issue 2, 2005, pages 139–149, ISSN 0002-9483, doi 10.1002/ajpa.20114
- ↑ Michael J. Coughlin, Hallux valgus, Postgraduate Medicine, volume 75, issue 5, 2016, pages 174–187, ISSN 0032-5481, doi 10.1080/00325481.1984.11698000
- ↑ A M Perera, Lyndon Mason, M M Stephens, The Pathogenesis of Hallux Valgus, The Journal of Bone and Joint Surgery-American Volume, volume 93, issue 17, 2011, pages 1650–1661, ISSN 0021-9355, doi 10.2106/JBJS.H.01630
- ↑ 4.0 4.1 Fay Crawford, Colin E Thomson, Fay Crawford, Interventions for treating plantar heel pain, 2003, doi 10.1002/14651858.CD000416
- ↑ 5.0 5.1 P. Caravaggi, T. Pataky, J. Y. Goulermas, R. Savage, R. Crompton, A dynamic model of the windlass mechanism of the foot: evidence for early stance phase preloading of the plantar aponeurosis, Journal of Experimental Biology, volume 212, issue 15, 2009, pages 2491–2499, ISSN 0022-0949, doi 10.1242/jeb.025767
- ↑ 6.0 6.1 EA Fuller, The windlass mechanism of the foot. A mechanical model to explain pathology, Journal of the American Podiatric Medical Association, volume 90, issue 1, 2000, pages 35–46, ISSN 8750-7315, doi 10.7547/87507315-90-1-35
