Difference between revisions of "Taping"
User:Fellrnr (User talk:Fellrnr | contribs) m (→Blister Supplies) |
User:Fellrnr (User talk:Fellrnr | contribs) |
||
| (12 intermediate revisions by the same user not shown) | |||
| Line 9: | Line 9: | ||
* You can tape a blister with or without popping it. Popping a blister is a bad idea, but sometimes it's necessary if the blister will spread. | * You can tape a blister with or without popping it. Popping a blister is a bad idea, but sometimes it's necessary if the blister will spread. | ||
* Taping should be a last resort; try to fix the underlying problem first. | * Taping should be a last resort; try to fix the underlying problem first. | ||
| + | =How taping helps= | ||
| + | Taping can help in several different ways: | ||
| + | # Taping can act as another layer, so that your socks move against the tape, not against your skin. This can reduce the friction on your skin, but the sheering forces remain. A tape with a smooth texture is best for this. | ||
| + | # Taping can spread the sheering forces, so that instead of being concentrated in one spot, like the ball of your foot, it is spread over a wider area. You need an inflexible tape for this, and sometimes a little tension when applying the tape. | ||
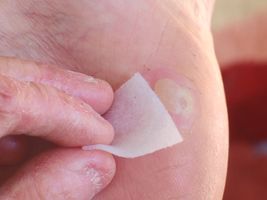
| + | # A variation of #2 above is to use the tape to stabilize a punctured or open blister. Even slight movement of the detached skin over the underlying flesh can be painful, and a layer of tape and help prevent this. | ||
| + | # It is possible to change the shape of your foot slightly by applying the tape with some tension. I normally only do this when taping blistered toes. This requires an inflexible tape and just the right amount of tension; too much will cause more problems. | ||
| + | # Tape can be used to prevent dirt entering a punctured or open blister, which may limit infection. Use a little antiseptic ointment on the opening and cover with tape. | ||
| + | # While taping can provide some padding, the tape is normally too thin to have much benefit. Building up multiple layers does not provide much more padding, and can increase pressure locally. | ||
=Tapes= | =Tapes= | ||
| − | I've used various tapes on myself and other runners, as well as conducting some specific comparison tests. I've applied multiple tapes on dry skin, wet skin and wet skin with adhesive promoter and left them in place until they fall off to see how they hold up. | + | I've used various tapes on myself and other runners, as well as conducting some specific comparison tests. I've applied multiple tapes on dry skin, wet skin and wet skin with adhesive promoter and left them in place until they fall off to see how they hold up. The wet skin tests had semi-macerated skin, where I'd kept the skin wet for several hours to mimic race conditions. |
| − | * '''Leukotape P'''. This is the only tape I've found that sticks to skin that is already wet without an adhesive promoter. If you only have one tape, this should probably be it. [http://www. | + | * '''Leukotape P'''. This is the only tape I've found that sticks to skin that is already wet without an adhesive promoter. If you only have one tape, this should probably be it. [http://www.amazon.com/BSN-Medical-Leukotape-Sports-Tape/dp/B000H94TAQ Leukotape P at Amazon.com]. |
* '''Hypafix'''. I have not used Hypafix extensively, but I've been impressed with its characteristics. It's inflexible, thin, soft and the edges don't fray too badly. [http://www.zombierunner.com/store/categories/foot_care/tapes/product968.html Hypafix at Zombie Runner]. | * '''Hypafix'''. I have not used Hypafix extensively, but I've been impressed with its characteristics. It's inflexible, thin, soft and the edges don't fray too badly. [http://www.zombierunner.com/store/categories/foot_care/tapes/product968.html Hypafix at Zombie Runner]. | ||
* '''Kinesio-Tex'''. This is a soft tape that stretches in one direction. I find that it does not stick well without an adhesive promoter, though rubbing the tape to warm it before applying will help it stick a little better. I also find the edges tend to fray, so I will often use some Micropore to stick the edges down. I find this is a good tape for between toes, where its softness is important. | * '''Kinesio-Tex'''. This is a soft tape that stretches in one direction. I find that it does not stick well without an adhesive promoter, though rubbing the tape to warm it before applying will help it stick a little better. I also find the edges tend to fray, so I will often use some Micropore to stick the edges down. I find this is a good tape for between toes, where its softness is important. | ||
| − | * '''Micropore'''. This was my default tape before I discovered Leukotape P, partly because I have been using Micropore from my earliest memories due to my skin condition. Micropore is very thin, smooth and inflexible, but not very sticky, so you should use it with an adhesive promoter. It will stick to dry skin and adhere well if given time, but that is only viable for pre-taping. It's thinness means it doesn't add much bulk nor does it fray, but it can peel up at the edges sometimes. [http://www.zombierunner.com/store/categories/foot_care/tapes/product6.html Micropore at Zombie Runner] | + | * '''Micropore'''. This was my default tape before I discovered [http://www.amazon.com/BSN-Medical-Leukotape-Sports-Tape/dp/B000H94TAQ Leukotape P], partly because I have been using Micropore from my earliest memories due to my skin condition. Micropore is very thin, smooth and inflexible, but not very sticky, so you should use it with an adhesive promoter. It will stick to dry skin and adhere well if given time, but that is only viable for pre-taping. It's thinness means it doesn't add much bulk nor does it fray, but it can peel up at the edges sometimes. [http://www.zombierunner.com/store/categories/foot_care/tapes/product6.html Micropore at Zombie Runner] |
* '''Elastikon'''. This tape is thicker than any of the others, slightly rough, but flexible and porous. I rarely use it, but it's worth considering if you need a flexible tape. [http://www.zombierunner.com/store/categories/foot_care/tapes/product1.html Elastikon at Zombie Runner]. | * '''Elastikon'''. This tape is thicker than any of the others, slightly rough, but flexible and porous. I rarely use it, but it's worth considering if you need a flexible tape. [http://www.zombierunner.com/store/categories/foot_care/tapes/product1.html Elastikon at Zombie Runner]. | ||
* '''Duct Tape.''' I strongly recommend against using duct tape, as it is not breathable, so the skin tends to become saturated underneath. Duct Tape also tends to wrinkle, creating creases that cause further problems. Like many other tapes, you need to use it with an adhesive promoter to get it to stick effectively. Watch the edges, as they tend to catch and then the tape then rolls up. I have used Micropore on the edges, with some success. If you really want to use Duct Tape, look for the Gorilla Tape brand, as the adhesive is better than most. | * '''Duct Tape.''' I strongly recommend against using duct tape, as it is not breathable, so the skin tends to become saturated underneath. Duct Tape also tends to wrinkle, creating creases that cause further problems. Like many other tapes, you need to use it with an adhesive promoter to get it to stick effectively. Watch the edges, as they tend to catch and then the tape then rolls up. I have used Micropore on the edges, with some success. If you really want to use Duct Tape, look for the Gorilla Tape brand, as the adhesive is better than most. | ||
| Line 32: | Line 40: | ||
|} | |} | ||
=Blister Supplies= | =Blister Supplies= | ||
| − | + | The images below are from my supplies for taping and blister fixing. If you need to assemble a smaller kit, here are my recommendations for the bare minimum, in order of importance: | |
| + | * '''Leukotape P'''. If I could only have one type of tape, it would be this one. | ||
| + | * '''Scissors'''. If you're just cutting the tape, most scissors will work fine. If you are using them to pop a blister then they need to be small and sharp. | ||
| + | * '''Alcohol Swabs'''. Cleaning the area before taping is important, and if you have to pop a blister, then it's vital. You can use some kitchen roll (or gauze) and rubbing alcohol instead. | ||
| + | * '''Adhesive promoter.''' You can get away without this, but it can make a big difference to how well the tape sticks. If you do use adhesive promoter, then you need a small makeup brush to apply it and some powder so it does not stick to the socks. Any type of powder will work, including talcum or baby powder. Tincture of Benzoin (friar's balsom) is the cheapest option. | ||
| + | * '''Hypodermic needles'''. I find these needles are so much better for popping a blister than scissors, but they are harder to get hold of. You will probably have to mail order them; as pharmacists don't like to sell hypodermics to people that don't have a prescription to justify their use. I get mine from [http://www.allegromedical.com Allegro Medical]. | ||
<gallery widths=300px heights=200px caption="Blister Treatment Supplies"> | <gallery widths=300px heights=200px caption="Blister Treatment Supplies"> | ||
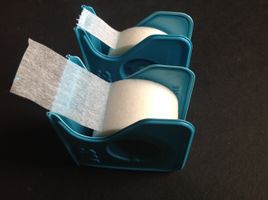
File:IMG 0097.JPG|Leukotape P, showing the slightly course texture | File:IMG 0097.JPG|Leukotape P, showing the slightly course texture | ||
| Line 50: | Line 63: | ||
File:IMG 0186.JPG|Another close up, with a coin to give scale. | File:IMG 0186.JPG|Another close up, with a coin to give scale. | ||
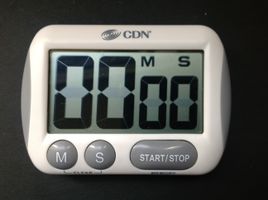
File:IMG 0103.JPG|If you’re working on other runner’s feet during a race, you need to keep track of time. | File:IMG 0103.JPG|If you’re working on other runner’s feet during a race, you need to keep track of time. | ||
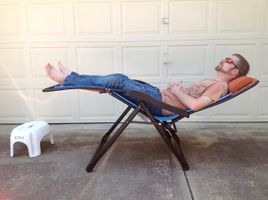
| + | File:IMG 0192.JPG|If you're fixing runner's feet at a race, then somewhere comfortable for them and you is important. This 'zero gravity' reclining chair allows them to relax without [[Stretching|stretching]] their hamstrings or stressing their hip flexors. It raises their feet enough to let you work on them, though the stool that's shown is useful as you still need to be quite low. Notice the foam sleep mat, which will help keep the runner from getting too cold. | ||
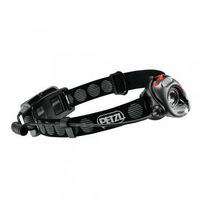
| + | File:Petzl MYO XP Full.jpg|A good [[Running Lights|light]] can be vital in poor lighting conditions. | ||
</gallery> | </gallery> | ||
| Line 75: | Line 90: | ||
* Cut the folds away, leaving a smooth covering. | * Cut the folds away, leaving a smooth covering. | ||
* Dust in powder so the excess adhesive does not stick to the socks. | * Dust in powder so the excess adhesive does not stick to the socks. | ||
| − | * If Injinji socks are not used, then the tape may rub on the next toe. It may be possible to cover part of the next toe with tape to prevent this, rather than taping every toe. | + | * If Injinji socks are not used, then the tape may rub on the next toe. It may be possible to cover part of the next toe with tape to prevent this, rather than taping every toe. |
| + | <gallery widths=300px heights=200px caption="Taping a partly blistered toe"> | ||
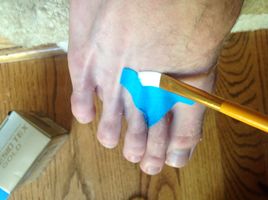
| + | File:IMG 0106.JPG|Apply the adhesive promoter to the good skin. | ||
| + | File:IMG 0107.JPG|Carefully wrap the toe in the tape. | ||
| + | File:IMG 0108.JPG|After the first wrap, you should end up with a cylinder of tape, ready for the next stage. | ||
| + | File:IMG 0109.JPG|Gently pinch the ends of the cylinder of tape together to cover the end of the toe. Aim for three large folds that can be snipped off. | ||
| + | File:IMG 0110.JPG|Cut the folds off with small scissors. You need to cut nearly all of the fold off, but not too much as a little bit of overlap is useful for keeping the tape together. | ||
| + | File:IMG 0111.JPG|The finished version should look like this. You can apply a strip of tape over the top of the end if you feel more security is needed. | ||
| + | </gallery> | ||
| + | |||
==Completely blistered toe== | ==Completely blistered toe== | ||
A completely blistered toe is unusual, but is especially problematic as there is no skin left to attach the tape to. Instead, tags of tape must be used to attach the tape to the foot. | A completely blistered toe is unusual, but is especially problematic as there is no skin left to attach the tape to. Instead, tags of tape must be used to attach the tape to the foot. | ||
| Line 84: | Line 108: | ||
* Mastisol is necessary; only use tincture of benzoin if Mastisol is not available. | * Mastisol is necessary; only use tincture of benzoin if Mastisol is not available. | ||
* Micropore or Leukotape are the best tape choices. | * Micropore or Leukotape are the best tape choices. | ||
| − | * Wrap the toe in tape; don't make the tape too tight as this could cause constriction. If the blister is not burst, care must be taken that the tape does not force the blister to spread further. | + | * Wrap the toe in tape; don't make the tape too tight as this could cause constriction. If the blister is not burst, care must be taken that the tape does not force the blister to spread further. You can't use adhesive promoter at this point as there is only blister you could adhere to. |
* Gently smooth the tape over the end of the toe, pinching into a few large folds. | * Gently smooth the tape over the end of the toe, pinching into a few large folds. | ||
* Cut the folds away, leaving a smooth covering. | * Cut the folds away, leaving a smooth covering. | ||
| Line 90: | Line 114: | ||
* Apply tape 'bridges' between the tape over the toe and the foot itself. | * Apply tape 'bridges' between the tape over the toe and the foot itself. | ||
* Dust in powder so the excess adhesive does not stick to the socks. | * Dust in powder so the excess adhesive does not stick to the socks. | ||
| − | * If Injinji socks are not used, then the tape may rub on the next toe. It may be possible to cover part of the next toe with tape to prevent this, rather than taping every toe. | + | * If Injinji socks are not used, then the tape may rub on the next toe. It may be possible to cover part of the next toe with tape to prevent this, rather than taping every toe. |
| + | <gallery widths=300px heights=200px caption="Taping a completely blistered toe"> | ||
| + | File:IMG 0107.JPG|Carefully wrap the toe in the tape. There is no adhesive promoter at this point as the toe is completely blistered. | ||
| + | File:IMG 0108.JPG|After the first wrap, you should end up with a cylinder of tape, ready for the next stage. | ||
| + | File:IMG 0109.JPG|Gently pinch the ends of the cylinder of tape together to cover the end of the toe. Aim for three large folds that can be snipped off. | ||
| + | File:IMG 0110.JPG|Cut the folds off with small scissors. You need to cut nearly all of the fold off, but not too much as a little bit of overlap is useful for keeping the tape together. | ||
| + | File:IMG 0112.JPG|Apply adhesive promoter to the skin behind the blistered area, and over the top of the tape where the tag in the next stage will be applied. | ||
| + | File:IMG 0113.JPG|Use a tag of tape to link the tape covering the blistered toe to the foot itself. | ||
| + | </gallery> | ||
| + | ==Between the toes== | ||
| + | A blister between the toes can be quite painful, and can easily spread under the foot. | ||
| + | * [[Blister Prevention#Blisters between toes|Prevention tips]] | ||
| + | * Clean the area as well as possible, which can be difficult in this area. | ||
| + | * A blister between the toes will sometimes require popping if the athlete is to continue running. | ||
| + | * Tincture of benzoin is recommended. | ||
| + | * A combination of Kinesio-Tex and Micropore or Leukotape is required. | ||
| + | * Apply the adhesive promoter to the skin of above and below the blister. | ||
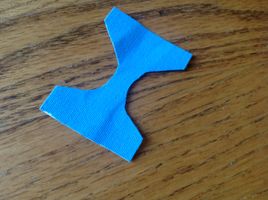
| + | * Cut a butterfly shape out of the Kinesio-Tex tape, so that the narrow section will fit between the toes. | ||
| + | * Apply the butterfly shape; help will be needed holding the toes apart. | ||
| + | * Use Micropore or Leukotape to tape the ends of the butterfly down. | ||
| + | * If time is limited, a simple strip of Kinesio-Tex tape could be used. | ||
| + | * Dust in powder so the excess adhesive does not stick to the socks. | ||
| + | ===Luxury=== | ||
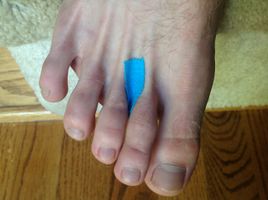
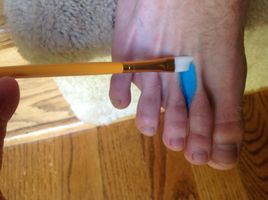
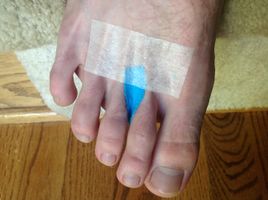
| + | <gallery widths=300px heights=200px caption="Taping blister between the toes"> | ||
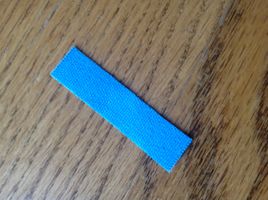
| + | File:IMG 0114.JPG|Cut a rectangle of Kinesio-Tex tape. | ||
| + | File:IMG 0115.JPG|Remove the sides of the rectangle to create a butterfly shape. | ||
| + | File:Image To Follow.JPG|Apply the adhesive promoter above and below the blistered area where the butterfly will adhere to good skin. | ||
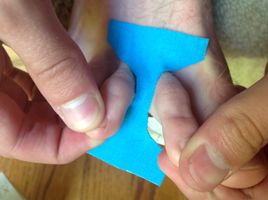
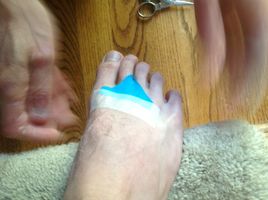
| + | File:IMG 0116.JPG|Apply the butterfly tape to the foot above the blister and then thread between the toes, peeling the backing as you go. You’ll need some help holding the toes apart. | ||
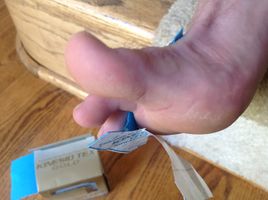
| + | File:IMG 0117.JPG|Continue applying the butterfly under the foot. | ||
| + | File:IMG 0118.JPG|The interim stage complete. | ||
| + | File:IMG 0119.JPG|Apply more adhesive promoter on the edge of the Kinesio-Tex tape and the surrounding skin. | ||
| + | File:IMG 0120.JPG|Apply Micropore (or Leukotape) to the edges. | ||
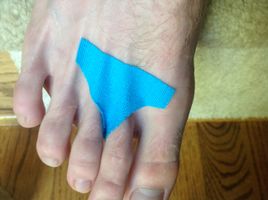
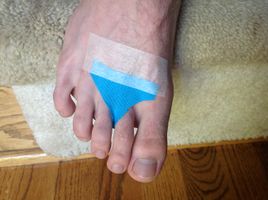
| + | File:IMG 0122.JPG|This is how it should look at the end. | ||
| + | </gallery> | ||
| + | ===Rapid=== | ||
| + | This approach is slightly quicker, but the narrow strip won't stay in place as well as the butterfly. | ||
| + | <gallery widths=300px heights=200px caption="Taping blister between the toes (quicker)"> | ||
| + | File:Image To Follow.JPG|Apply the adhesive promoter above and below the blistered area where the strip will adhere to good skin. | ||
| + | File:BetweenStrip.JPG|Cut a narrow rectangle of Kinesio-Tex tape. | ||
| + | File:BetweenFirstTape.JPG|Apply the narrow strip to the foot above the blister and then thread between the toes, peeling the backing as you go. You’ll need some help holding the toes apart. | ||
| + | File:BetweenExtraAP.JPG|Apply more adhesive promoter on the edge of the Kinesio-Tex tape and the surrounding skin. | ||
| + | File:IMG 0126.JPG|Apply Micropore (or Leukotape) to the edges. | ||
| + | </gallery> | ||
| + | |||
==Side of the big toe== | ==Side of the big toe== | ||
This is basically the same as the partially blistered toe, but there is a stronger case for cutting open the toe box of the shoe near the blister. | This is basically the same as the partially blistered toe, but there is a stronger case for cutting open the toe box of the shoe near the blister. | ||
| Line 137: | Line 204: | ||
* Apply the adhesive promoter to the undamaged skin either side of the blister. | * Apply the adhesive promoter to the undamaged skin either side of the blister. | ||
* Apply tape over the ball of the foot and up either side, but don't circle the foot entirely as this could constrict blood supply. | * Apply tape over the ball of the foot and up either side, but don't circle the foot entirely as this could constrict blood supply. | ||
| + | <gallery widths=300px heights=200px caption="Taping a blistered ball of the foot"> | ||
| + | File:BallAP.JPG|Apply the adhesive promoter around the blistered area where the tape will adhere to good skin. | ||
| + | File:BallStartTape.JPG|Apply the tape around the forefoot, going up the sides. | ||
| + | File:BallFolded.JPG|Pinch the excess tape into a small number of folds. | ||
| + | File:BallTrim.JPG|Cut the folds off with small scissors. You need to cut nearly all of the fold off, but not too much as a little bit of overlap is useful for keeping the tape together. | ||
| + | File:BallFinished.JPG|The finished version. | ||
| + | </gallery> | ||
==Under the heel== | ==Under the heel== | ||
This is similar to the ball of the foot, with the tape applied up either side of the heel. [[Blister Prevention# Blisters under the heel of the foot|Prevention tips]] | This is similar to the ball of the foot, with the tape applied up either side of the heel. [[Blister Prevention# Blisters under the heel of the foot|Prevention tips]] | ||
| − | |||
| − | |||
| − | |||
| − | |||
| − | |||
| − | |||
| − | |||
| − | |||
| − | |||
| − | |||
| − | |||
| − | |||
| − | |||
==Back of the heel and Achilles== | ==Back of the heel and Achilles== | ||
A blister here is almost as nasty as under the ball of the foot. Flexibility is required for normal foot movement and there is pressure from the shoe. | A blister here is almost as nasty as under the ball of the foot. Flexibility is required for normal foot movement and there is pressure from the shoe. | ||
Latest revision as of 12:13, 6 October 2013
Taping may be required to prevent blisters or if they occur anyway, to help treat them. Different tapes have different properties, and it's best to gain experience with different tapes before using them in a race. Even putting a piece of tape on the edge of your hand will give you an idea of how well it stick and how flexible it is.
Contents
- 1 General Taping Tips
- 2 How taping helps
- 3 Tapes
- 4 Blister Supplies
- 5 How to tape a blister
- 6 Pre-Taping
- 7 Also See
- 8 References
1 General Taping Tips
- Practice taping for your training runs – remember The Golden Rule of Racing
- Remember your feet may swell so avoid taping too tightly.
- If you get a blister, taping can prevent it getting worse and can relieve the pain.
- Taping a blister can create more pressure on the blister if done incorrectly.
- You can tape a blister with or without popping it. Popping a blister is a bad idea, but sometimes it's necessary if the blister will spread.
- Taping should be a last resort; try to fix the underlying problem first.
2 How taping helps
Taping can help in several different ways:
- Taping can act as another layer, so that your socks move against the tape, not against your skin. This can reduce the friction on your skin, but the sheering forces remain. A tape with a smooth texture is best for this.
- Taping can spread the sheering forces, so that instead of being concentrated in one spot, like the ball of your foot, it is spread over a wider area. You need an inflexible tape for this, and sometimes a little tension when applying the tape.
- A variation of #2 above is to use the tape to stabilize a punctured or open blister. Even slight movement of the detached skin over the underlying flesh can be painful, and a layer of tape and help prevent this.
- It is possible to change the shape of your foot slightly by applying the tape with some tension. I normally only do this when taping blistered toes. This requires an inflexible tape and just the right amount of tension; too much will cause more problems.
- Tape can be used to prevent dirt entering a punctured or open blister, which may limit infection. Use a little antiseptic ointment on the opening and cover with tape.
- While taping can provide some padding, the tape is normally too thin to have much benefit. Building up multiple layers does not provide much more padding, and can increase pressure locally.
3 Tapes
I've used various tapes on myself and other runners, as well as conducting some specific comparison tests. I've applied multiple tapes on dry skin, wet skin and wet skin with adhesive promoter and left them in place until they fall off to see how they hold up. The wet skin tests had semi-macerated skin, where I'd kept the skin wet for several hours to mimic race conditions.
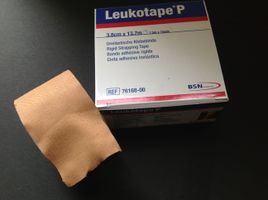
- Leukotape P. This is the only tape I've found that sticks to skin that is already wet without an adhesive promoter. If you only have one tape, this should probably be it. Leukotape P at Amazon.com.
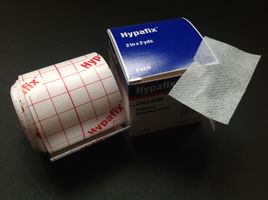
- Hypafix. I have not used Hypafix extensively, but I've been impressed with its characteristics. It's inflexible, thin, soft and the edges don't fray too badly. Hypafix at Zombie Runner.
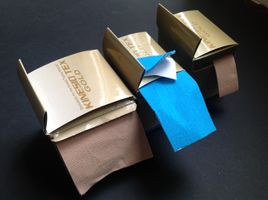
- Kinesio-Tex. This is a soft tape that stretches in one direction. I find that it does not stick well without an adhesive promoter, though rubbing the tape to warm it before applying will help it stick a little better. I also find the edges tend to fray, so I will often use some Micropore to stick the edges down. I find this is a good tape for between toes, where its softness is important.
- Micropore. This was my default tape before I discovered Leukotape P, partly because I have been using Micropore from my earliest memories due to my skin condition. Micropore is very thin, smooth and inflexible, but not very sticky, so you should use it with an adhesive promoter. It will stick to dry skin and adhere well if given time, but that is only viable for pre-taping. It's thinness means it doesn't add much bulk nor does it fray, but it can peel up at the edges sometimes. Micropore at Zombie Runner
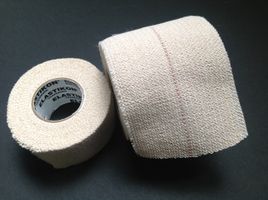
- Elastikon. This tape is thicker than any of the others, slightly rough, but flexible and porous. I rarely use it, but it's worth considering if you need a flexible tape. Elastikon at Zombie Runner.
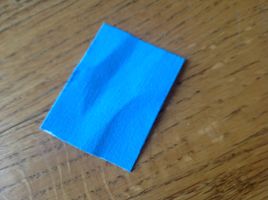
- Duct Tape. I strongly recommend against using duct tape, as it is not breathable, so the skin tends to become saturated underneath. Duct Tape also tends to wrinkle, creating creases that cause further problems. Like many other tapes, you need to use it with an adhesive promoter to get it to stick effectively. Watch the edges, as they tend to catch and then the tape then rolls up. I have used Micropore on the edges, with some success. If you really want to use Duct Tape, look for the Gorilla Tape brand, as the adhesive is better than most.
| Thickness | Texture | Flexibility | Adhesion | Edges Fraying | Edges Peeling | Tape Edges with Micropore? | On dry skin | On wet skin | On wet skin with adhesive promoter | |
|---|---|---|---|---|---|---|---|---|---|---|
| Leukotape P | Thin | Smooth | Inflexible | Good | Slight Fraying | Slight | Optional | Good adhesion | Reasonable adhesion | Good adhesion |
| Hypafix | Thin | Smooth | Inflexible | Good | Negligable Fraying | Some | Optional | Good adhesion | No adhesion | Great adhesion |
| Kinesio-Tex | Medium | Medium | Flexible in one direction | Very poor | Lots of fraying | Prone | Required on cut edges | Good adhesion, but edge peal | No adhesion | Reasonable adhesion, but edge peal |
| Micropore | Very thin | Very Smooth | Inflexible | Poor | No Fraying | Slight | N/A | Good adhesion | No adhesion | Good adhesion |
| Elastikon | Thick | Coarse | Flexible | Good | Some fraying | Prone | Recommended | Good adhesion, but edge peal | No adhesion | Good adhesion |
4 Blister Supplies
The images below are from my supplies for taping and blister fixing. If you need to assemble a smaller kit, here are my recommendations for the bare minimum, in order of importance:
- Leukotape P. If I could only have one type of tape, it would be this one.
- Scissors. If you're just cutting the tape, most scissors will work fine. If you are using them to pop a blister then they need to be small and sharp.
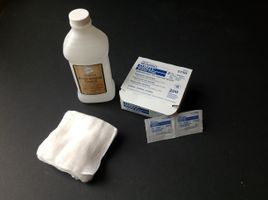
- Alcohol Swabs. Cleaning the area before taping is important, and if you have to pop a blister, then it's vital. You can use some kitchen roll (or gauze) and rubbing alcohol instead.
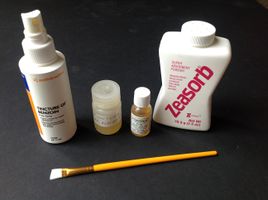
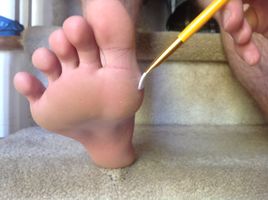
- Adhesive promoter. You can get away without this, but it can make a big difference to how well the tape sticks. If you do use adhesive promoter, then you need a small makeup brush to apply it and some powder so it does not stick to the socks. Any type of powder will work, including talcum or baby powder. Tincture of Benzoin (friar's balsom) is the cheapest option.
- Hypodermic needles. I find these needles are so much better for popping a blister than scissors, but they are harder to get hold of. You will probably have to mail order them; as pharmacists don't like to sell hypodermics to people that don't have a prescription to justify their use. I get mine from Allegro Medical.
- Blister Treatment Supplies
Adhesive promoters are nearly always needed to get tape to stick well. Tincture of Benzoin (friar’s balsom) is cheaper than Mastiol, but not as strong. The spray bottle that Tincture of Benzoin comes in is rather useless, so I transfer to a smaller bottle and use a brush to apply it. Some type of powder should be used so the excess adhesive promoter does not stick where it’s not wanted. I use Zeasorb, but baby powder is as good for this. Friar's Balsam/Tinture of Benzoin at Zombie Runner and Mastisol at Zombie Runner.
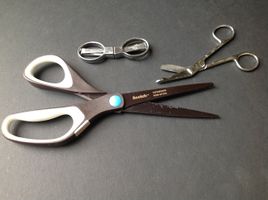
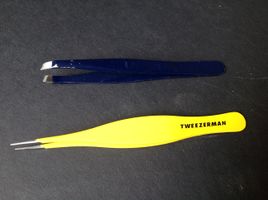
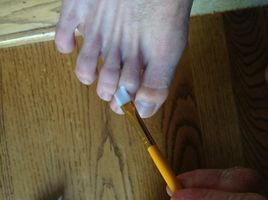
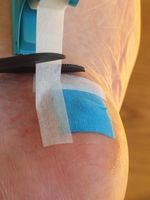
I’ve found these Scotch non-stick scissors to be good for cutting the tape as they don’t gum up as quickly as others and are long enough to cut the tape in one snip. The folding scissors can be handy, especially for delicate cuts of the tape like the butterfly needed for between the toes. I don’t use scissors to cut blisters.
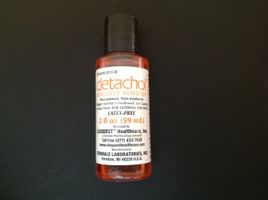
This adhesive remover works great for removing tape, especially around blisters. You still have to be careful, easing up the edges and applying some of the detachol, but it's quite easy. I use a cotton bud to rub the detachol at the point where the tape meets the skin. It seems to leave no residue or upset the skin in any way. Eloquest Healthcare Detachol
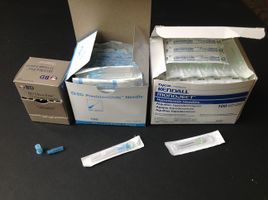
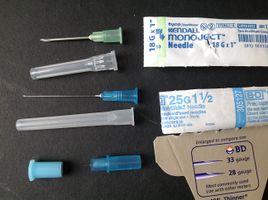
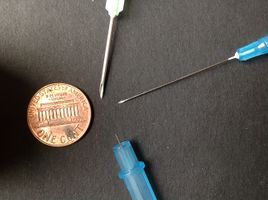
I prefer to use hypodermic needles for popping blisters. The 18 gauge needle works well at producing a reasonable size hole that is less likely to reseal, though multiple punctures may be necessary. The finer gauge 25 gauge can be used on thicker skin. The very fine 33 gauge needle is for blood glucose testing; I don’t often use these, but they are far easier to buy than a hypodermic. (Pharmacies are reluctant to sell hypodermics without some obvious medical justification, so I get mine online in bulk.)
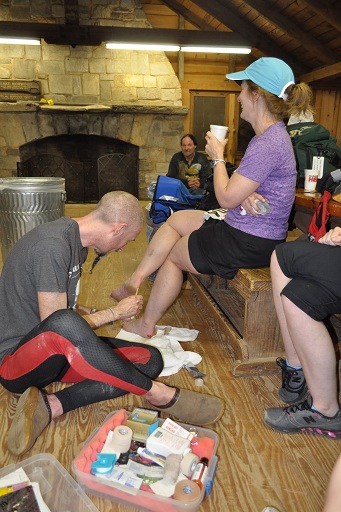
If you're fixing runner's feet at a race, then somewhere comfortable for them and you is important. This 'zero gravity' reclining chair allows them to relax without stretching their hamstrings or stressing their hip flexors. It raises their feet enough to let you work on them, though the stool that's shown is useful as you still need to be quite low. Notice the foam sleep mat, which will help keep the runner from getting too cold.
A good light can be vital in poor lighting conditions.
5 How to tape a blister
I've practiced taping my own blisters, and worked the Umstead 100 aid station, taping many runners feet.
5.1 General Principles
- Clean the area around the blister. If lubricant has been used, this can be tricky to remove completely. Using alcohol can help; I'd recommend using plenty of rubbing alcohol as it's cheap and a good solvent.
- Be aware of the passage of time during a race, as it's possible to burn through enough time that meeting the cut offs becomes difficult.
- Only burst blisters if they are likely to spread.
- Adhesive promoter is usually a good idea.
- Avoid duct tape – it's macho, but a poor solution.
- Applying a small amount of anti-biotic ointment onto the blister itself can help prevent it getting stuck to the tape and provides a small measure of protection from infection if the blister bursts naturally.
- Dust with powder as a final step so the excess adhesive does not stick to the socks.
5.2 Partially blistered toe
This is quite a common area to blister.
- Prevention tips
- Try to clean the area as well as possible.
- A blister on the toes will sometimes require popping if the athlete is to continue running.
- Cutting open the toe box may help, but has some risk if this is done in the middle of a race.
- Mastisol is recommended, but tincture of benzoin will work.
- Micropore or Leukotape are the best tape choices.
- Apply the adhesive promoter to the skin of the toe that is unblistered. Applying to the toe nail may be necessary if there is little unblistered skin left, but this will make the tape hard to remove.
- Wrap the toe in tape; don't make the tape too tight as this could cause constriction. If the blister is not burst, care must be taken that the tape does not force the blister to spread further.
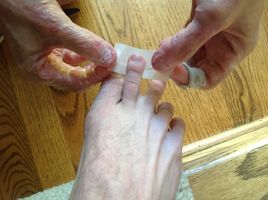
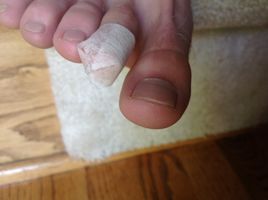
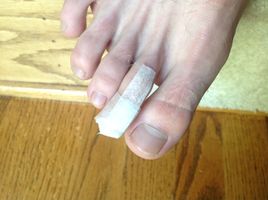
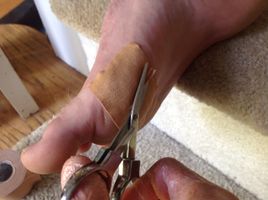
- Gently smooth the tape over the end of the toe, pinching into a few large folds.
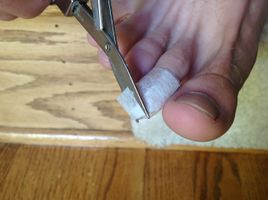
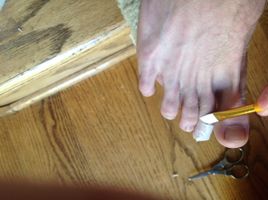
- Cut the folds away, leaving a smooth covering.
- Dust in powder so the excess adhesive does not stick to the socks.
- If Injinji socks are not used, then the tape may rub on the next toe. It may be possible to cover part of the next toe with tape to prevent this, rather than taping every toe.
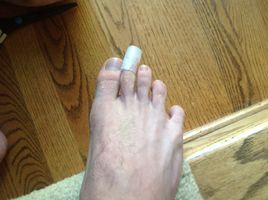
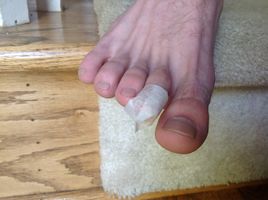
- Taping a partly blistered toe
5.3 Completely blistered toe
A completely blistered toe is unusual, but is especially problematic as there is no skin left to attach the tape to. Instead, tags of tape must be used to attach the tape to the foot.
- Prevention tips
- Try to clean the area as well as possible.
- A complete blistering of a toe will often require popping if the athlete is to continue running.
- Cutting open the toe box may help, but has some risk if this is done in the middle of a race.
- Mastisol is necessary; only use tincture of benzoin if Mastisol is not available.
- Micropore or Leukotape are the best tape choices.
- Wrap the toe in tape; don't make the tape too tight as this could cause constriction. If the blister is not burst, care must be taken that the tape does not force the blister to spread further. You can't use adhesive promoter at this point as there is only blister you could adhere to.
- Gently smooth the tape over the end of the toe, pinching into a few large folds.
- Cut the folds away, leaving a smooth covering.
- Apply the adhesive promoter to the skin of the foot near the toe and to the tape at the top and bottom of the toe.
- Apply tape 'bridges' between the tape over the toe and the foot itself.
- Dust in powder so the excess adhesive does not stick to the socks.
- If Injinji socks are not used, then the tape may rub on the next toe. It may be possible to cover part of the next toe with tape to prevent this, rather than taping every toe.
- Taping a completely blistered toe
5.4 Between the toes
A blister between the toes can be quite painful, and can easily spread under the foot.
- Prevention tips
- Clean the area as well as possible, which can be difficult in this area.
- A blister between the toes will sometimes require popping if the athlete is to continue running.
- Tincture of benzoin is recommended.
- A combination of Kinesio-Tex and Micropore or Leukotape is required.
- Apply the adhesive promoter to the skin of above and below the blister.
- Cut a butterfly shape out of the Kinesio-Tex tape, so that the narrow section will fit between the toes.
- Apply the butterfly shape; help will be needed holding the toes apart.
- Use Micropore or Leukotape to tape the ends of the butterfly down.
- If time is limited, a simple strip of Kinesio-Tex tape could be used.
- Dust in powder so the excess adhesive does not stick to the socks.
5.4.1 Luxury
- Taping blister between the toes
5.4.2 Rapid
This approach is slightly quicker, but the narrow strip won't stay in place as well as the butterfly.
- Taping blister between the toes (quicker)
5.5 Side of the big toe
This is basically the same as the partially blistered toe, but there is a stronger case for cutting open the toe box of the shoe near the blister.
5.6 Sides of heel
- Prevention tips
- A blister on the side of the foot will sometimes require popping if the athlete is to continue running. If the blister is small and just starting to form, it may be okay to leave it depending on the conditions and the length of the race remaining.
- Small blisters could be left intact, but larger blisters will require popping if the athlete is to continue running.
- Do you have lots of time? Then use the luxury taping approach, otherwise use the rapid approach.
5.6.1 Rapid
- Clean the area thoroughly.
- Tincture of benzoin is recommended, but use Mastisol if the conditions are wet.
- Micropore or Leukotape are the best tape choices.
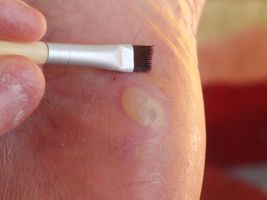
- Apply the adhesive promoter to the skin around the blister, far enough around to ensure it goes beyond the taping.
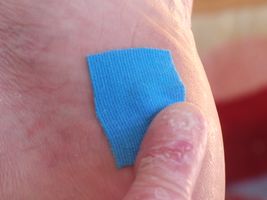
- Place a piece of Micropore or Leukotape over the blister, providing at least 0.5 inch/1cm beyond the edge of the blister.
- Gently smooth the tape; if there are any creases, pinch them into a few large folds and cut the folds away.
- Dust in powder so the excess adhesive does not stick to the socks.
5.6.2 Luxury
- Clean the area thoroughly.
- Tincture of benzoin is required, but use Mastisol if the conditions are wet.
- Use Kinesio-Tex with Micropore.
- Apply the adhesive promoter to the skin around the blister, far enough around to ensure it goes beyond the taping.
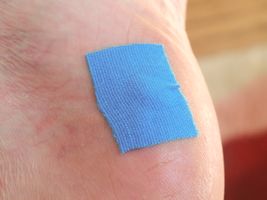
- Place a piece of Kinesio-Tex over the blister, providing at least 0.5 inch/1cm beyond the edge of the blister.
- Gently smooth the tape; if there are any creases, pinch them into a few large folds and cut the folds away.
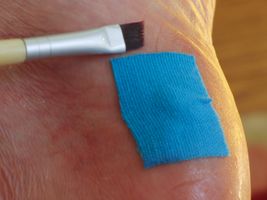
- Apply more adhesive promoter to the skin around the Kinesio-Tex tape and to the edges of the tape itself, far enough around to ensure it goes another 0.5 inch/1cm beyond the Kinesio-Tex taping.
- Apply strips of Micropore around the edges of the Kinesio-Text tape.
- Dust in powder so the excess adhesive does not stick to the socks.
- Taping the sides of the heel
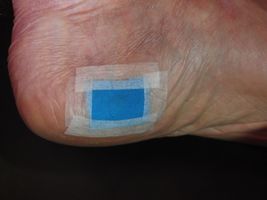
Cut the Kinesio-Tex tape a little larger than the blister. Bigger gives more sticking area, which is good, but the extra coverage can cause that skin to become saturated with sweat, so it's a compromise. Push down on the tape around the blister to make a good seal. You're looking to create pressure and a little heat.
5.7 Side of ball
The side of the ball of the foot can be treated much like the sides of heel, but there is more movement due to the bending of the foot. Small blisters can use the rapid approach, but for larger areas, the flexibility of the Kinesio-Tex tape may justify the extra effort. Prevention tips - Blister Prevention#Blisters on the sides of the forefoot.
5.8 Under the ball
This is one of the nastiest places to get a blister, as it is the primary part of the foot used for running.
- Prevention tips
- Clean the area thoroughly.
- Popping the blister is normally required if it has not naturally popped under the pressure of running.
- Tincture of benzoin is recommended, and Mastisol is generally not required as there is normally plenty of skin on the sides and top of the foot to adhere to.
- The best tape is Leukotape, as you want to stabilize the damaged skin and limit the motion of the blister against the underlying sub-skin. Flexible tape is not going to help
- Apply the adhesive promoter to the undamaged skin either side of the blister.
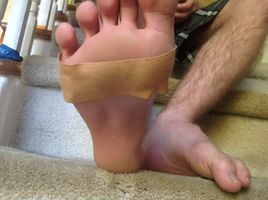
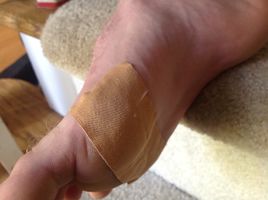
- Apply tape over the ball of the foot and up either side, but don't circle the foot entirely as this could constrict blood supply.
- Taping a blistered ball of the foot
5.9 Under the heel
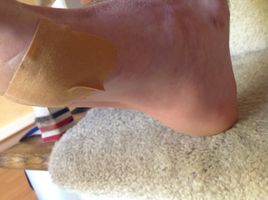
This is similar to the ball of the foot, with the tape applied up either side of the heel. Prevention tips
5.10 Back of the heel and Achilles
A blister here is almost as nasty as under the ball of the foot. Flexibility is required for normal foot movement and there is pressure from the shoe.
- Prevention tips
- A blister on the back of the heel or Achilles will sometimes require popping if the athlete is to continue running.
- Do you have lots of time? Then use the luxury taping approach, otherwise use the rapid approach.
5.10.1 Rapid
- Clean the area thoroughly.
- Tincture of benzoin is recommended, but use Mastisol if the conditions are wet.
- Leukotape is the best tape choice.
- Apply the adhesive promoter to the skin around the blister, far enough around to ensure it goes beyond the taping.
- Place a piece of Leukotape over the blister, providing at least 0.5 inch/1cm beyond the edge of the blister.
- Gently smooth the tape; if there are any creases, pinch them into a few large folds and cut the folds away.
- Dust in powder so the excess adhesive does not stick to the socks.
5.10.2 Luxury
- Clean the area thoroughly.
- Tincture of benzoin is required, but use Mastisol if the conditions are wet.
- Use Kinesio-Tex with Micropore.
- Apply the adhesive promoter to the skin around the blister, far enough around to ensure it goes beyond the taping.
- Place a piece of Kinesio-Tex over the blister, providing at least 0.5 inch/1cm beyond the edge of the blister.
- Gently smooth the tape; if there are any creases, pinch them into a few large folds and cut the folds away.
- Apply more adhesive promoter to the skin around the Kinesio-Tex tape and to the edges of the tape itself, far enough around to ensure it goes another 0.5 inch/1cm beyond the Kinesio-Tex taping.
- Apply strips of Micropore around the edges of the Kinesio-Text tape.
- Dust in powder so the excess adhesive does not stick to the socks.
6 Pre-Taping
As well is taping a blister that has already occurred, it is possible to take before the race begins. There are advantages and disadvantages to this approach, and if possible, it is far better to avoid the underlying causes of blistering.
6.1 Advantages of pre-taping
- If you found no way of preventing the blisters then pre-taping may help.
- Pre-taping is done on dry skin, so generally adhesion is much better.
- And you can spend a lot more time doing the pre-taping than is possible or practical during the actual race.
- Some adhesives seem to become stronger after a day or so.
- Taping a day or two before the race allows you to check the taping fits correctly and is not going to cause a problem.
6.2 Disadvantages of pre-taping
- It's harder to check if a blister is forming if you've pre-taped your feet. I've seen a number of runners who were convinced they had blisters when in fact it was just a hotspot.
- The taping has to last for the full length of the race when you pre-tape, which can be a challenge for longer races. Always use an adhesive promoter when pre-taping.
- It's possible for the tape to ruck up and actually cause a blister rather than prevent one. I've had tape come loose and migrate to a different part of the foot where it caused a blister that would never otherwise have occurred.
- Your feet may swell during the race, and taping can cause constriction. This is especially a problem if you tape around a toe.
6.3 Approaches to pre-taping
There are two approaches to pre-taping; Spot taping and area taping. Spot taping is where you apply tape to a small area that is blister prone. I have found that this can be a useful approach if you have a particular vulnerability. Area taping involves applying tape to a large portion of the foot, creating what amounts to a tape-based sock. The advantages of area taping are that the edges of the tape are well away from the pressure zones. However, area taping is generally trickier to get right.
6.4 Tapes for pre-taping
You may find that different takes are appropriate for pre-taping, as there is no blister that requires protection. I generally prefer Micropore for pre-taping, as it is low friction and reduces any stretching forces on the skin.
7 Also See
- Fixing Your Feet is a great book that includes details of taping
- Blister Prevention
- Popping Blisters
- Blister Prevention and Socks
- Toughening Feet
