Difference between revisions of "High Speed Video Analysis"
User:Fellrnr (User talk:Fellrnr | contribs) (Created page with "High Speed Video is a great way of analyzing your Running Form. While high end equipment is extremely expensive, there are a number of options for relatively inexpensive c...") |
User:Fellrnr (User talk:Fellrnr | contribs) |
||
| Line 117: | Line 117: | ||
** For the first contact frame: | ** For the first contact frame: | ||
*** Measure the angle of the heel/forefoot line to estimate strike angle and therefore strike index. This can be categorized into FFS, MFS, RFS. | *** Measure the angle of the heel/forefoot line to estimate strike angle and therefore strike index. This can be categorized into FFS, MFS, RFS. | ||
| − | *** Find the horizontal distance from the middle of the foot to the hip to check for overstriding. | + | *** Find the horizontal distance from the middle of the foot to the hip to check for [[Overstriding|overstriding]]. |
*** Look at the angle between the hip/knee and the knee/ankle to determine how straight the leg is. A straighter leg may indicate a higher impact force. | *** Look at the angle between the hip/knee and the knee/ankle to determine how straight the leg is. A straighter leg may indicate a higher impact force. | ||
** Evaluate the frames between first and last contact: | ** Evaluate the frames between first and last contact: | ||
Revision as of 15:29, 29 July 2013
High Speed Video is a great way of analyzing your Running Form. While high end equipment is extremely expensive, there are a number of options for relatively inexpensive cameras with this ability.
Contents
[hide]1 Cameras with High Speed Video
| Camera | Resolution | Pixel Count | Resolution |
|---|---|---|---|
|
Casio EX-ZR100 ($360) Casio EX-ZR10 |
432 x 320 | 138.2K | 240 |
| 224 x 160 | 35.8K | 480 | |
| 224 x 64 | 14.3K | 1000 | |
|
Casio EX-ZR1000 Casio EX-ZR700 Casio EX-ZR400 Casio EX-ZR300 ($369) Casio EX-ZR200 ($320) Casio EX-ZR20 Casio EX-ZR15 |
640x480 | 307.2K | 120 |
| 512x384 | 196.6K | 240 | |
| 224x160 | 35.8K | 480 | |
| 224x64 | 14.3K | 1000 | |
|
Nikon J1 ($400) |
640 x 240 | 153.6K | 400 (5 second max) |
| 320 x 120 | 38.4K | 1200 (5 second max) | |
|
GoPro Hero3 Black Edition ($400) |
1280x960 | 1228.8K | 100 |
| 1280x720 | 921.6K | 120 | |
| 848x480 | 407K | 240 | |
| GoPro Hero3 Silver Edition ($300) | 848x480 | 407K | 120 |
2 Camera Recommendations
There are pros and cons to the various cameras.
- I've used the Casio cameras a number of times, and they are easy to use and work well. The resolution and quality of the higher frame rates it too poor to be of much use, so don't expect to be able to use the 1000 fps mode.
- You can sometimes get used High Speed EXILIM cameras on ebay for a reasonable cost.
- The Nikon J1 is crippled by its 5 second maximum record time.
- The GoPro a good frame rate and a nice resolution, as well as a WiFi remote control
- There is no LCD screen for replay of the video on the GoPro, so you need to by the LCD Screen for $80.
3 Evaluating the video
The simplest approach is to step through the video frame by frame, which is possible with many software video players. For a more detailed analysis you can extract each frame into a separate photo file using the free open source software FFMpeg. You can use the following command to extract separate images, but you probably want to extract a short relevant clip before you run this command or you will end up with too many image files to handle.
ffmpeg -i input.avi -f image2 image-%4d.jpeg
Where:
- Input.avi is the name of your input video file
- image-%4d.jpeg is the name of the output files, with %4d replaced by the frame number
4 Sample Output
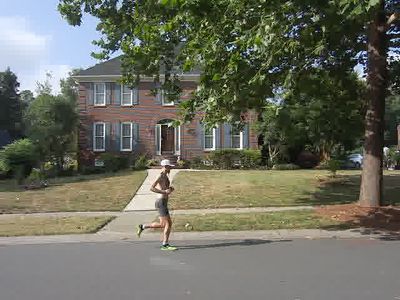
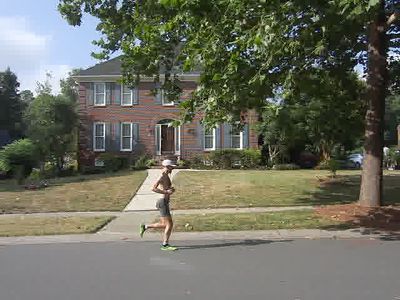
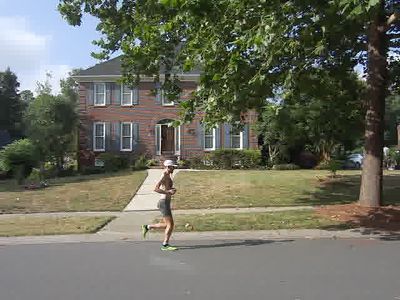
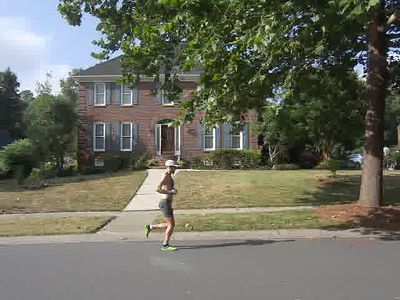
Below are four consecutive frames from a recording at 120 fps to give a sense of the resolution and timing of the available video from a Casio camera. These pictures look identical on first glance, but there is slight movement visible if you rapidly swap between the images.
5 Automated Analysis Software
I am hoping to write some software that will perform some automated analysis. Here are my current thoughts on the algorithm that could be used.
- Capture:
- Shoot so that the runner is shown from the waist down.
- Use good light to ensure a fast shutter speed.
- The runner should be against a relatively plain background, on flat, level ground.
- Put markers on the runner over the hip, knee, ankle, heel and forefoot.
- Processing:
- Scan the video, extracting each frame.
- This may be the trickiest part, as working with video in code is rather nasty.
- Scan each frame to detect the five markers and reduce them to the x/y coordinates.
- For each set of five markers, identify the body positions:
- The hip will be the highest.
- The knee will be next highest.
- The forefoot will be furthest away of the remaining three.
- The heel and ankle can be found based on the angle between then and the forefoot.
- Find the frames that represent the first contact. This will be the first frame where either the forefoot or heel ceases to move.
- Find the frames that represent the last contact. This will be the first frame that follows first contact where both the forefoot and heel are in motion.
- For the first contact frame:
- Measure the angle of the heel/forefoot line to estimate strike angle and therefore strike index. This can be categorized into FFS, MFS, RFS.
- Find the horizontal distance from the middle of the foot to the hip to check for overstriding.
- Look at the angle between the hip/knee and the knee/ankle to determine how straight the leg is. A straighter leg may indicate a higher impact force.
- Evaluate the frames between first and last contact:
- Determine if the heel touches down at any point. This can further categorize FFS.
- Look at the change in knee angle to see how the landing force is absorbed.
- Evaluate the frames between two first contact points:
- Measure Cadence.
- Measure the contact time, the float time, and the ratio between the two.
- Try to determine paw back from the maximum horizontal distance from the midfoot to the hip and the horizontal distance at contact.
- Try to determine the probable horizontal speed of the foot at contact.
- Try to evaluate the peak deceleration of the hip on landing to determine impact forces.
- Output metrics and possibly key images with overlays of the angles and lines.
- Scan the video, extracting each frame.


