Difference between revisions of "Cycling HIIT For Runners"
User:Fellrnr (User talk:Fellrnr | contribs) |
User:Fellrnr (User talk:Fellrnr | contribs) |
||
| (3 intermediate revisions by the same user not shown) | |||
| Line 1: | Line 1: | ||
| − | [[High Intensity Interval Training]] | + | [[High Intensity Interval Training]] is a highly effective form of exercise, but running at very high intensities is problematic. If you run much faster on level ground, your stride becomes radically different as you are sprinting more than running, and this is an elongation of your stride increases injury risk quite dramatically. It's also very hard to keep your running form under control at such high speed and high intensity. Running uphill alleviates this someone, but it's hard to find a hill long enough and steep enough, and even then, the biomechanics are different enough that you're training somewhat different muscle groups. These differences are one of the reasons for the increase in injury risk. One solution to the injury risk is to train on a stationary bike. If you're out of the saddle, your muscle recruitment is somewhat similar to running, but with much a lower injury risk. This page is a guide to performing HIIT on a stationary bike for runners. Some of this may apply to cyclists, but a cyclist will have somewhat different requirements as they will perform more than just HIIT on the stationary bike. |
=The Trainer= | =The Trainer= | ||
| − | Unlike running, you'll need rather more equipment. I | + | Unlike running, you'll need rather more equipment. I initially brought the Wahoo Kickr Snap, a "wheel-on smart trainer" which is cycling a talk that means you put a bike with its rear wheel in place on to the trainer. It's a trainer that I liked was quite affordable, but I found the trainer became such a core part of my training regime that I upgraded to the Tacx Neo2. This is a top-end bike trainer, that is more responsive to changes in resistance, as well as much quieter. However, the biggest thing that attracted me to the Neo2 is that you don't have to calibrate it. Most bike trainers, including the Kickr, have to do a "spin down". As the name suggests you ride the bike until you hit the specified speed, and then stop pedaling. The app measures how long it takes for the wheel to stop spinning, and uses that time to estimate the braking forces and inertia. I found this tedious, and it was worth it to me to know that the power was accurate every time. |
| − | + | These "smart trainers" are more than just marketing, and it means that the trainer can be controlled wirelessly. There are several wireless control modes, such as simulation where software tells the trainer to mimic going uphill and ERG mode, where the trainer requires you to generate a certain fixed amount of power. ERG mode is a bit weird at first, as it means that the faster you pedal, the less resistance, and the slower you pedal the more resistance. The trainer maintains whatever resistance is required to keep your power output at the target. The Kickr can be controlled using either Bluetooth or Ant+ and transmits your power and speed over both simultaneously. | |
=The Bike= | =The Bike= | ||
| − | I used a mountain bike that's nearly 30 years old, as | + | I used a mountain bike that's nearly 30 years old, as things like weight don't matter. I did put on a tire specifically designed for use on an indoor trainer, as the slightly nobly tires that were on the bike made an outrageous noise. It doesn't matter about brakes, or steering, as it's a stationary bike after all. You do want comfortable handlebars, and I much prefer the straight bars of a mountain bike to the drop handlebars of a road bike. You should be spending a lot of your time out of the saddle, so that's not as important for a runner just doing HIIT as it would be for a cyclist. You certainly don't need to spend loads of money on this gorgeous leather saddle, even though its design has been unchanged for over 100 years. When I got the saddle I thought it was a gratuitous waste of money, loosely justified as an "objet d'art", but having used it since early 2018, the comfort has justified the price. While I don't spend as many hours in the saddle as a cyclist would, having a comfortable interface doesn't make a difference. |
| − | You certainly don't need to spend loads of money on this gorgeous leather saddle, | + | [[File:Brooks B17.jpg|center|thumb|200px| The [https://amzn.to/2WxRRI4 Brooks B17 Saddle].]] |
| − | [[File:Brooks B17.jpg|center|thumb| | + | I did end up refurbishing the group set, mostly because my old mountain bike was five-speed, and my new TACX trainer wasn't compatible, though my bottom bracket bearings were also disintegrating. I ended up going with a Shimano Zee/Deore 1x10 drivetrain, though in practice I don't think I've shifted gear once since I got the bike set up. A single-speed would have been cheaper with hindsight. If I'm honest, I only have the frame, forks, and handlebars from the original bike, and I've replaced pretty much everything else. |
=Software= | =Software= | ||
To get the best use out of the trainer, you'll need some software to control it. There are lots of options, but if you don't want to pay a monthly subscription, things get a little trickier. I'm assuming that as a runner, you'll only want to use the trainer for regular, short HIIT sessions. | To get the best use out of the trainer, you'll need some software to control it. There are lots of options, but if you don't want to pay a monthly subscription, things get a little trickier. I'm assuming that as a runner, you'll only want to use the trainer for regular, short HIIT sessions. | ||
==Ant+ or Bluetooth?== | ==Ant+ or Bluetooth?== | ||
| − | Software that runs on iOS uses Bluetooth, and of course only one device can receive data from a Bluetooth sensor. This means that if you have a Bluetooth heart rate monitor, it can only be paired with iOS or a sports watch, not both at the same time. The same is true of the Bluetooth communication from the Kickr. | + | Software that runs on iOS uses Bluetooth, and of course, only one device can receive data from a Bluetooth sensor. This means that if you have a Bluetooth heart rate monitor, it can only be paired with iOS or a sports watch, not both at the same time. The same is true of the Bluetooth communication from the Kickr. |
| + | ==Slope by Time== | ||
| + | most of the training software available will allow you to create a structured workout. This allows you to define the workout as something like two minutes at 100w, followed by repeats of 30s at 200w with 30s recovery at 100w. As noted above, if you say 100w, the trainer will vary resistance to keep power output constant. The software and trainer can also do a fixed resistance, so the faster you pedal the more power output, typically configured as a percentage slope. The big problem I've found is that you can do power output by time, or slope by distance, but there are few options for doing slope by time. The only software I found that will do slope by time is the Tacx, though I heavily modified Golden Cheetah to support this for my personal use. If you know of other software that does structured workouts using slope by time, please let me know. | ||
==Zwift== | ==Zwift== | ||
| − | You can use Zwift for free, but you're limited to 25 km per calendar month. That's | + | You can use Zwift for free, but you're limited to 25 km per calendar month. That's not very much, and probably not enough to support more than 2, maybe 3 HIIT sessions per month. Zwift works out your based on your power output, so cranking out lots of watts will get you through your free kilometers even faster. The good news is that Zwift has a nice visual workout editor that allows you to put together your HIIT session fairly easily. Zwift provides a virtual riding environment that's gorgeous, and each interval transition is shown by a translucent virtual barrier, so you can see the transitions coming up. I found this was great for preparing for an upcoming interval or holding on for an upcoming rest period. Because of Zwift scales your speed to your power output, you get a nice sense of achievement when you're pushing hard. If you do much indoor cycling, then I think it's worth considering a subscription to Zwift. The software is available as an app for an iOS or Android device, and I found it worked nicely on an iPad. There is a PC version, but I never got that to work properly (I didn't try terribly hard.) |
<gallery widths=300px heights=300px class="center"> | <gallery widths=300px heights=300px class="center"> | ||
File:Zwift (3).png| The virtual world is lovely, and here you can see the translucent orange barrier that marks the start of the next interval. | File:Zwift (3).png| The virtual world is lovely, and here you can see the translucent orange barrier that marks the start of the next interval. | ||
| Line 18: | Line 20: | ||
File:Zwift (5).png| The work out editor in use. | File:Zwift (5).png| The work out editor in use. | ||
File:Zwift (4).png| When selecting a workout, you see the structure. | File:Zwift (4).png| When selecting a workout, you see the structure. | ||
| − | File:Zwift (2).png| Post workout analysis; fairly simple but a nice overview. | + | File:Zwift (2).png| Post-workout analysis; fairly simple but a nice overview. |
</gallery> | </gallery> | ||
==Golden Cheetah== | ==Golden Cheetah== | ||
| − | Golden Cheetah is free, open source software that runs on a PC, Mac, or Linux server. As you might expect from something that runs on Linux, it's not | + | Golden Cheetah is free, open-source software that runs on a PC, Mac, or Linux server. As you might expect from something that runs on Linux, it's not user-friendly, but amazingly powerful. The user interface paradigm is different from any other software I've tried and takes some getting used to. Even after using it for a while, it still feels clunky and awkward. That said, the workout editor is by far my favorite, being both powerful and quick to use (once you've climbed the steep and painful learning curve.) It's always a bad sign when you need to watch a video to understand how to use the software, but it's the only way. Check out [https://vimeo.com/192126358 Workout Editor] and [https://vimeo.com/152278941 Workout Editor QWKCODE and Edit/Run] videos. You can edit a workout visually, but you can also enter what they call "QWKCODES", which is a text-based entry system. So "30s@150" is 30 seconds at 150 watts. You can specify a ramp, so "30s@150-180" will ramp up from 150 watts to 180 watts over 30 seconds. You can add recovery periods, so "30s@350r30s@125" will do 350 watts for seconds then 125 watts for 30 seconds. You can add repeats by saying "6x30s@350r30s@125" for six repeats. Times can be in minutes, so "1m" for 1 minute. There may be more, but I found no documentation. |
[[File:GC Workout editor.jpg|center|thumb|300px| The workout editor in Golden Cheetah.]] | [[File:GC Workout editor.jpg|center|thumb|300px| The workout editor in Golden Cheetah.]] | ||
| − | Golden Cheetah doesn't provide any kind of simulated world, but it does provide a wealth of data that they can display in real time. You'll need an Ant+ USB adapter, but GC supports a wide variety of sensors. | + | Golden Cheetah doesn't provide any kind of simulated world, but it does provide a wealth of data that they can display in real-time. You'll need an Ant+ USB adapter, but GC supports a wide variety of sensors. |
| − | [[File:GC realtime.png|center|thumb|300px| The real time display, with the workout being filled in with actual data from the ride. ]] | + | [[File:GC realtime.png|center|thumb|300px| The real-time display, with the workout being filled in with actual data from the ride. ]] |
Golden Cheetah stores the workouts in ERG files, which encodes the interval duration as fractional minutes to two decimal places. This means that durations of 20 seconds get converted to "0.33" which will get turned back to 19 seconds, which is rather frustrating. To avoid this, you'll need to use durations that are divisible by three seconds, so instead of 20 seconds, you'll need to set 18 or 21 seconds. | Golden Cheetah stores the workouts in ERG files, which encodes the interval duration as fractional minutes to two decimal places. This means that durations of 20 seconds get converted to "0.33" which will get turned back to 19 seconds, which is rather frustrating. To avoid this, you'll need to use durations that are divisible by three seconds, so instead of 20 seconds, you'll need to set 18 or 21 seconds. | ||
| + | If you see spikes in the power curve when using Golden Cheetah with a Kickr, it may be because you have the Kickr connected as multiple devices. You should connect the Kickr as just FE-C (Fitness Equipment Control) and leave both the speed and power sources as blank. | ||
| + | ==Tacx == | ||
| + | The Tacx software is available for Windows, Mac, iOS, and Android, but only supports Tacx trainers. It has a monthly subscription to get simulated rides that use real video footage rather than 3-D rendering, but a lot of the functionality is available without a subscription. The killer feature of the Tacx software for me is the ability to do slope by time. | ||
| + | <gallery widths=300px heights=300px class="center"> | ||
| + | File:Tacx1.JPG | ||
| + | File:Tacx 2.JPG | ||
| + | File:tacx3.JPG | ||
| + | </gallery> | ||
==Wahoo App== | ==Wahoo App== | ||
| − | I | + | I expected the Wahoo app to provide all the basic functionality you'd need. Sadly, this is not the case. You can do some manual control of resistance, but there's no way of using it to run a predefined HIIT session. You do need to use the Wahoo app to calibrate the trainer (see above), plus there are a couple of options you can set only thought the app. You can configure the trainer to simulate a speed that is proportional to the power you're applying in ERG mode. By default, it will just report the actual speed of the wheel, and in ERG mode you can be moving very slowly with huge resistance. This setting is overridden by Zwift, which uses its own speed calculation based on power and the virtual slope you're virtually riding on. |
[[File:Wahoo App Kickr Settings.png|center|thumb|300px| The settings in the Wahoo App. ]] | [[File:Wahoo App Kickr Settings.png|center|thumb|300px| The settings in the Wahoo App. ]] | ||
==Hurts Ergo== | ==Hurts Ergo== | ||
| − | Hurts Ergo is a free, minimalist iOS app. You have to edit the HIIT workouts using [www.73summits.com/ergdb], which I found quite cumbersome and clunky. One problem for HIIT workouts is that you have to | + | Hurts Ergo is a free, minimalist iOS app. You have to edit the HIIT workouts using [www.73summits.com/ergdb], which I found quite cumbersome and clunky. One problem for HIIT workouts is that you have to specify the duration in minutes, so 20 seconds is 0.333… minutes, which is unintuitive at best. The app itself doesn't work well, and I found that fractional minutes didn't always result in predictable interval lengths. So sometimes 0.33 minutes was 17 seconds, and sometimes 23 seconds, which is annoying. On the other hand, it's a simple, fairly easy to use app. |
[[File:Hurts Egro.png|center|thumb|300px| The Hurts Ergo app]] | [[File:Hurts Egro.png|center|thumb|300px| The Hurts Ergo app]] | ||
=Other Equipment= | =Other Equipment= | ||
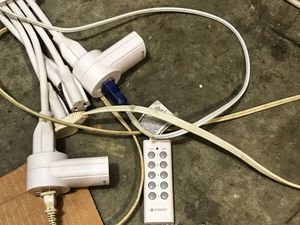
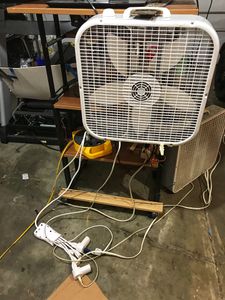
| − | You'll need a fan | + | You'll need a fan; probably several really big fans. Ideally, you want some way of turning the fans on while you're riding a bike. It can be chilly when you first start, but by the time you've warmed up, you'll want some air movement. Overheating can be a serious problem doing HIIT on a stationary bike. The biggest issue is the possibility of a sudden rise in core temperature that could lead to heatstroke. That's not common, but it's something to be aware of if you're new to HIIT. The more common problem is that to prevent overheating, your subconscious will reduce muscle recruitment well ahead of serious problems arising, so you may feel weak before you feel hot. One approach to cooling that I found helpful is to put a remote-control adapter onto my box fans. This is much cheaper than buying a fan with a remote control, and also makes it easier to control up to 5 fans from one remote. I got the [https://www.amazon.com/gp/product/B01N5JSAHM Etekcity Five Pack Remote Control] which has 2 remote controls, and 5 power adapters. This allows me to start working out without any air movement, and gradually increase the number of fans as a warm-up. |
<gallery widths=300px heights=300px class="center"> | <gallery widths=300px heights=300px class="center"> | ||
File:Remote Fan2.jpg | File:Remote Fan2.jpg | ||
| Line 40: | Line 50: | ||
</gallery> | </gallery> | ||
Having some water handy is also a good idea. You're unlikely to dehydrate much during a short HIIT session, but I find the heavy breathing tends to try my throat out. Chewing on a mint can help a little by getting the saliva flowing, as saliva is far more lubricating than water. | Having some water handy is also a good idea. You're unlikely to dehydrate much during a short HIIT session, but I find the heavy breathing tends to try my throat out. Chewing on a mint can help a little by getting the saliva flowing, as saliva is far more lubricating than water. | ||
| + | =My Training Setup= | ||
| + | Here are some pictures of my setup, along with the notes. | ||
| + | <gallery widths=300px heights=300px class="center"> | ||
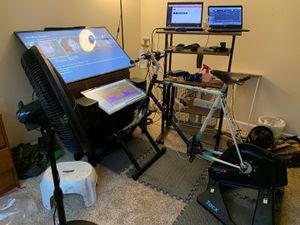
| + | File:My Tacx Setup (1).jpg| this overview shows the layout, with a big TV and monitor in front of me, and two laptops to the side. I have some old, cheap gym flooring to catch the sweat. You will notice that the TV monitor is angled upwards, which makes them at right angles to my vision in my natural cycling position. This prevents neck strain while training. Getting sweat on the lower monitor is an issue, but it's a very old monitor, so I'm happy just to wipe it dry after the workout. | ||
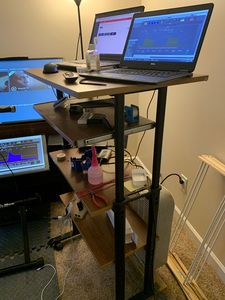
| + | File:My Tacx Setup (2).jpg| I have one laptop for entertainment, even though the TV has built-in Netflix and Amazon Prime. That's mostly so I can watch coursera.org lectures and YouTube videos while I'm training. The other laptop runs my training software, currently a heavily customized version of Golden Cheetah. One note is that I originally had a low powered laptop for the entertainment and a more powerful one for the training software, but I found video playback needed more GPU power and I had to swap them over. | ||
| + | File:My Tacx Setup (3).jpg| Having two displays is valuable, as it separates entertainment from data visualization. | ||
| + | File:My Tacx Setup (4).jpg| I have a cheap humidifier that blows the moist air onto my face, as I find during intense interval training my throat will dry out and I will end up with a hacking cough. I mounted this in an old water bottle with the top cut open. The one I ordered is https://amzn.to/2J9dG94 though there are several similar personal humidifiers. | ||
| + | File:My Tacx Setup (5).jpg| Bike trainers typically come with a small platform to raise your front wheel, which works well enough, but I had two problems with that approach. The first is that it didn't feel quite stable enough when I was at really high intensities. For instance, during a [[3AOT]] workout the low oxygen saturation can make me a little dizzy. The second problem is that having the front wheel on the bike means that my lower monitor was too far forward for comfort. I solved this problem by getting a wheel-on trainer and using simply to mount the front wheel. I removed the resistance mechanism, which obviously I didn't need. One problem I hit was that the front hub is narrower than the rear hub, but this particular trainer went narrow enough. The train I got is no longer available, but it's still listed on Amazon at [https://amzn.to/3djuNmg https://amzn.to/3djuNmg](I paid about $50, and there are other similar trainers for roughly similar prices.) | ||
| + | File:My Tacx Setup (6).jpg| Normally when I get on the bike, I tend to tilt over slightly to get my leg over more easily, but you can't do that on an indoor trainer. I found that having a small step to the side of the trainer makes it a lot easier to get on and off. | ||
| + | </gallery> | ||
=What Watts?= | =What Watts?= | ||
| − | Cyclists have been using the power meters of the years, and have | + | Cyclists have been using the power meters of the years, and have several terms that are likely to be unfamiliar to runners. |
* '''FTP'''. This is "Functional Threshold Power" and is the maximum power that can be sustained for an hour. Cyclists used this rather like a runner would use their "5K pace", though cyclists often use percentages of FTP. (FTP is a trademark of Training Peaks.) | * '''FTP'''. This is "Functional Threshold Power" and is the maximum power that can be sustained for an hour. Cyclists used this rather like a runner would use their "5K pace", though cyclists often use percentages of FTP. (FTP is a trademark of Training Peaks.) | ||
* '''CP'''. Critical Power is the power that can be maintained 'indefinitely' or for a 'very long time without fatigue'<ref name="Hill-1993"/>, though this has been redefined so "indefinitely" is ~30-minutes<ref name="PooleBurnley2016"/>. CP is generally between [[Lactate Threshold]] and [[VO2max|V̇O<sub>2</sub>max]]. | * '''CP'''. Critical Power is the power that can be maintained 'indefinitely' or for a 'very long time without fatigue'<ref name="Hill-1993"/>, though this has been redefined so "indefinitely" is ~30-minutes<ref name="PooleBurnley2016"/>. CP is generally between [[Lactate Threshold]] and [[VO2max|V̇O<sub>2</sub>max]]. | ||
* '''Power Curve. '''If you measure your CP for different durations you build up a curve, which is sometimes called the power curve or power-duration curve. | * '''Power Curve. '''If you measure your CP for different durations you build up a curve, which is sometimes called the power curve or power-duration curve. | ||
| − | * '''Power at V̇O<sub>2</sub>max'''. This is one that cyclists may not refer to | + | * '''Power at V̇O<sub>2</sub>max'''. This is one that cyclists may not refer to usually but it is a common intensity for HIIT workouts used in scientific research. For instance, the well-known [[Tabata]] workout is performed at 170% of the power at [[VO2max|V̇O<sub>2</sub>max]]. |
| − | * '''W′'''. Pronounced "double-u prime", can be thought of as a measure of anaerobic capacity<ref name="MoritaniNagata2007"/>. It's the work that can be performed above CP, in Joules. W' is | + | * '''W′'''. Pronounced "double-u prime", can be thought of as a measure of anaerobic capacity<ref name="MoritaniNagata2007"/>. It's the work that can be performed above CP, in Joules. W' is the shape of the power-duration curve. W' can be used to estimate the point of failure for anaerobic exercise, something that Golden Cheetah will visualize for you. So exercise above CP will result in a depletion of W', and when W' hits zero, you should be unable to continue (or at least, only continue at your critical power.) |
=Estimating Power At V̇O2max From Running Performance= | =Estimating Power At V̇O2max From Running Performance= | ||
| − | If you're a runner, there's a good chance you'll have no idea where to start in setting up a power based workout. I did a little research on the topic, and based on nine studies I found that you can get a rough estimate of power at V̇O<sub>2</sub>max from [[VO2max|V̇O2max]] which in turn you can estimate from your running performance. I refined that formula based on a study of 1,715 subjects that I found later<ref name="SilvaAraújo2015"/>. | + | If you're a runner, there's a good chance you'll have no idea where to start in setting up a power-based workout. I did a little research on the topic, and based on nine studies I found that you can get a rough estimate of power at V̇O<sub>2</sub>max from [[VO2max|V̇O2max]] which in turn you can estimate from your running performance. I refined that formula based on a study of 1,715 subjects that I found later<ref name="SilvaAraújo2015"/>. |
* The first step is to estimate your [[VO2max|V̇O<sub>2</sub>max]], which you can do using my [[Running Calculator]] (or anybody else's as there are lots on the Internet.) You'll need to enter a recent race performance, though you could use a 5K time trial from training. For instance, a three-hour marathon represents a [[VO2max|V̇O<sub>2</sub>max]] of 54. (Cycling [[VO2max|V̇O<sub>2</sub>max]] is likely to be a little different to your running value, but it's good enough for this estimate.) | * The first step is to estimate your [[VO2max|V̇O<sub>2</sub>max]], which you can do using my [[Running Calculator]] (or anybody else's as there are lots on the Internet.) You'll need to enter a recent race performance, though you could use a 5K time trial from training. For instance, a three-hour marathon represents a [[VO2max|V̇O<sub>2</sub>max]] of 54. (Cycling [[VO2max|V̇O<sub>2</sub>max]] is likely to be a little different to your running value, but it's good enough for this estimate.) | ||
* There is a relationship between [[VO2max|V̇O<sub>2</sub>max]] and power at [[VO2max|V̇O<sub>2</sub>max]] which varies based on sex. | * There is a relationship between [[VO2max|V̇O<sub>2</sub>max]] and power at [[VO2max|V̇O<sub>2</sub>max]] which varies based on sex. | ||
** Men: Watts/Kg = ([[VO2max|V̇O<sub>2</sub>max]] – 7.0) / 10.791 | ** Men: Watts/Kg = ([[VO2max|V̇O<sub>2</sub>max]] – 7.0) / 10.791 | ||
** Women: Watts/Kg = ([[VO2max|V̇O<sub>2</sub>max]] – 7.0) / 9.820 | ** Women: Watts/Kg = ([[VO2max|V̇O<sub>2</sub>max]] – 7.0) / 9.820 | ||
| − | * Example, for my [[VO2max|V̇O<sub>2</sub>max]] of | + | * Example, for my [[VO2max|V̇O<sub>2</sub>max]] of 63, is ((63-7)/10.791), or 5.19 Watts/Kg. Multiplied by my weight in kilograms to get total power. Multiplying 5.19 Watts/Kg by 63 Kg gives 320 Watts. |
| − | + | This gives a starting point for HIIT. While it's tempting to aim for interval intensities above your power at [[VO2max|V̇O<sub>2</sub>max]], I'd strongly suggest you start somewhat lower and build up. You can build up the intensity either over several sessions, or have increasing intensity intervals during a single workout. You'll also find that as you get used to the cycling, the power you can output will increase quite a bit. | |
| − | This gives a starting point for HIIT. While it's tempting to aim for interval intensities above your power at [[VO2max|V̇O<sub>2</sub>max]], I'd strongly suggest you start somewhat lower and build up. You can build up the intensity either over several sessions, or have increasing intensity intervals during a single workout. You'll also find that as you get | ||
=Estimating Power At V̇O2max From Submaximal Incremental Test= | =Estimating Power At V̇O2max From Submaximal Incremental Test= | ||
| − | If you know your [Maximum Heart Rate]] from a running test, you can perform a submaximal incremental test on the bike to estimate your Power at V̇O<sub>2</sub>max. Knowing your maximum heart rate requires a stress test, as it '''cannot be calculated'''! But, if you do happen to know your maximum heart rate, perhaps from a running [[VO2max|V̇O2max]] test, or perhaps from a finishing kick during a short race, this is another approach to consider. Simply warm up, and then perform an incremental test, recording your heart rate. Make sure you don't get hot, as this will skew the results. I use | + | If you know your [Maximum Heart Rate]] from a running test, you can perform a submaximal incremental test on the bike to estimate your Power at V̇O<sub>2</sub>max. Knowing your maximum heart rate requires a stress test, as it '''cannot be calculated'''! But, if you do happen to know your maximum heart rate, perhaps from a running [[VO2max|V̇O2max]] test, or perhaps from a finishing kick during a short race, this is another approach to consider. Simply warm-up, and then perform an incremental test, recording your heart rate. Make sure you don't get hot, as this will skew the results. I use five steps going from 150w to 350w in 50w increments. The steps need to be long enough for your heart rate to stabilize, and you take the average heart rate from the last section of each step. For instance, my results were 150w/137, 200w/144, 250w/155, 300w/166, 350/169. Plotting that in Excel gives an R<sup>2</sup> value of 0.98. This predicts my power at [[VO2max|V̇O<sub>2</sub>max]] to be about 455w, which is close to the calculation above. |
=Measuring Power At V̇O2max = | =Measuring Power At V̇O2max = | ||
| − | + | The best solution is obviously to perform a [[VO2max|V̇O<sub>2</sub>max]] test. If you're going to go through the pain and suffering of the maximal incremental stress test, then I'd recommend doing it at a lamp where they can measure your oxygen consumption. You could do a similar test at home with a cycling trainer, but you won't know your oxygen consumption unless you have the budget for lab great gear. Getting the incremental steps right seems to be a bit of a dark art. Typically the steps are 60 seconds long and aim to produce exhaustion in 3-6 minutes. The increments need to be coarse enough to produce voluntary exhaustion, while fine enough to give a reasonable precision. I've seen increments of 25w used in research papers. You'll know when you've hit [[VO2max|V̇O<sub>2</sub>max]] when the power increases, but your heart rate does not. This deflection is considered the definition of [[VO2max|V̇O<sub>2</sub>max]], where work increases but oxygen consumption does not. Note that it's estimated that half of all subjects never demonstrate the heart rate/oxygen consumption deflection that's part of the definition of [[VO2max|V̇O<sub>2</sub>max]]. | |
=References= | =References= | ||
<references> | <references> | ||
Latest revision as of 11:51, 22 March 2020
High Intensity Interval Training is a highly effective form of exercise, but running at very high intensities is problematic. If you run much faster on level ground, your stride becomes radically different as you are sprinting more than running, and this is an elongation of your stride increases injury risk quite dramatically. It's also very hard to keep your running form under control at such high speed and high intensity. Running uphill alleviates this someone, but it's hard to find a hill long enough and steep enough, and even then, the biomechanics are different enough that you're training somewhat different muscle groups. These differences are one of the reasons for the increase in injury risk. One solution to the injury risk is to train on a stationary bike. If you're out of the saddle, your muscle recruitment is somewhat similar to running, but with much a lower injury risk. This page is a guide to performing HIIT on a stationary bike for runners. Some of this may apply to cyclists, but a cyclist will have somewhat different requirements as they will perform more than just HIIT on the stationary bike.
Contents
[hide]1 The Trainer
Unlike running, you'll need rather more equipment. I initially brought the Wahoo Kickr Snap, a "wheel-on smart trainer" which is cycling a talk that means you put a bike with its rear wheel in place on to the trainer. It's a trainer that I liked was quite affordable, but I found the trainer became such a core part of my training regime that I upgraded to the Tacx Neo2. This is a top-end bike trainer, that is more responsive to changes in resistance, as well as much quieter. However, the biggest thing that attracted me to the Neo2 is that you don't have to calibrate it. Most bike trainers, including the Kickr, have to do a "spin down". As the name suggests you ride the bike until you hit the specified speed, and then stop pedaling. The app measures how long it takes for the wheel to stop spinning, and uses that time to estimate the braking forces and inertia. I found this tedious, and it was worth it to me to know that the power was accurate every time. These "smart trainers" are more than just marketing, and it means that the trainer can be controlled wirelessly. There are several wireless control modes, such as simulation where software tells the trainer to mimic going uphill and ERG mode, where the trainer requires you to generate a certain fixed amount of power. ERG mode is a bit weird at first, as it means that the faster you pedal, the less resistance, and the slower you pedal the more resistance. The trainer maintains whatever resistance is required to keep your power output at the target. The Kickr can be controlled using either Bluetooth or Ant+ and transmits your power and speed over both simultaneously.
2 The Bike
I used a mountain bike that's nearly 30 years old, as things like weight don't matter. I did put on a tire specifically designed for use on an indoor trainer, as the slightly nobly tires that were on the bike made an outrageous noise. It doesn't matter about brakes, or steering, as it's a stationary bike after all. You do want comfortable handlebars, and I much prefer the straight bars of a mountain bike to the drop handlebars of a road bike. You should be spending a lot of your time out of the saddle, so that's not as important for a runner just doing HIIT as it would be for a cyclist. You certainly don't need to spend loads of money on this gorgeous leather saddle, even though its design has been unchanged for over 100 years. When I got the saddle I thought it was a gratuitous waste of money, loosely justified as an "objet d'art", but having used it since early 2018, the comfort has justified the price. While I don't spend as many hours in the saddle as a cyclist would, having a comfortable interface doesn't make a difference.

I did end up refurbishing the group set, mostly because my old mountain bike was five-speed, and my new TACX trainer wasn't compatible, though my bottom bracket bearings were also disintegrating. I ended up going with a Shimano Zee/Deore 1x10 drivetrain, though in practice I don't think I've shifted gear once since I got the bike set up. A single-speed would have been cheaper with hindsight. If I'm honest, I only have the frame, forks, and handlebars from the original bike, and I've replaced pretty much everything else.
3 Software
To get the best use out of the trainer, you'll need some software to control it. There are lots of options, but if you don't want to pay a monthly subscription, things get a little trickier. I'm assuming that as a runner, you'll only want to use the trainer for regular, short HIIT sessions.
3.1 Ant+ or Bluetooth?
Software that runs on iOS uses Bluetooth, and of course, only one device can receive data from a Bluetooth sensor. This means that if you have a Bluetooth heart rate monitor, it can only be paired with iOS or a sports watch, not both at the same time. The same is true of the Bluetooth communication from the Kickr.
3.2 Slope by Time
most of the training software available will allow you to create a structured workout. This allows you to define the workout as something like two minutes at 100w, followed by repeats of 30s at 200w with 30s recovery at 100w. As noted above, if you say 100w, the trainer will vary resistance to keep power output constant. The software and trainer can also do a fixed resistance, so the faster you pedal the more power output, typically configured as a percentage slope. The big problem I've found is that you can do power output by time, or slope by distance, but there are few options for doing slope by time. The only software I found that will do slope by time is the Tacx, though I heavily modified Golden Cheetah to support this for my personal use. If you know of other software that does structured workouts using slope by time, please let me know.
3.3 Zwift
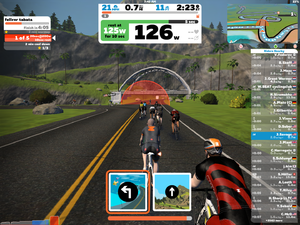
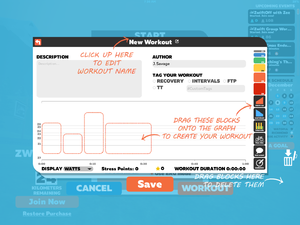
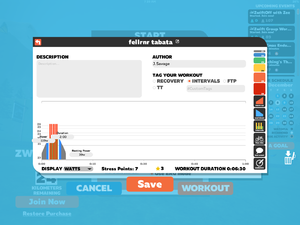
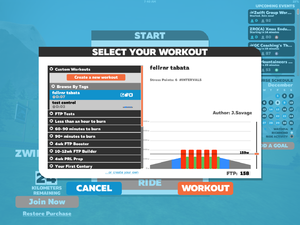
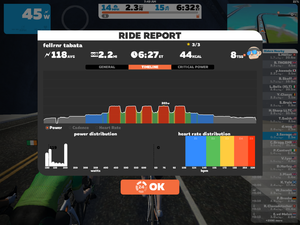
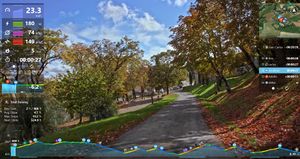
You can use Zwift for free, but you're limited to 25 km per calendar month. That's not very much, and probably not enough to support more than 2, maybe 3 HIIT sessions per month. Zwift works out your based on your power output, so cranking out lots of watts will get you through your free kilometers even faster. The good news is that Zwift has a nice visual workout editor that allows you to put together your HIIT session fairly easily. Zwift provides a virtual riding environment that's gorgeous, and each interval transition is shown by a translucent virtual barrier, so you can see the transitions coming up. I found this was great for preparing for an upcoming interval or holding on for an upcoming rest period. Because of Zwift scales your speed to your power output, you get a nice sense of achievement when you're pushing hard. If you do much indoor cycling, then I think it's worth considering a subscription to Zwift. The software is available as an app for an iOS or Android device, and I found it worked nicely on an iPad. There is a PC version, but I never got that to work properly (I didn't try terribly hard.)
3.4 Golden Cheetah
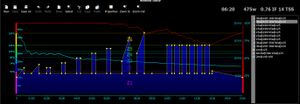
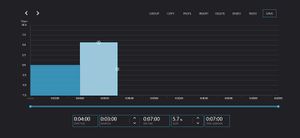
Golden Cheetah is free, open-source software that runs on a PC, Mac, or Linux server. As you might expect from something that runs on Linux, it's not user-friendly, but amazingly powerful. The user interface paradigm is different from any other software I've tried and takes some getting used to. Even after using it for a while, it still feels clunky and awkward. That said, the workout editor is by far my favorite, being both powerful and quick to use (once you've climbed the steep and painful learning curve.) It's always a bad sign when you need to watch a video to understand how to use the software, but it's the only way. Check out Workout Editor and Workout Editor QWKCODE and Edit/Run videos. You can edit a workout visually, but you can also enter what they call "QWKCODES", which is a text-based entry system. So "30s@150" is 30 seconds at 150 watts. You can specify a ramp, so "30s@150-180" will ramp up from 150 watts to 180 watts over 30 seconds. You can add recovery periods, so "30s@350r30s@125" will do 350 watts for seconds then 125 watts for 30 seconds. You can add repeats by saying "6x30s@350r30s@125" for six repeats. Times can be in minutes, so "1m" for 1 minute. There may be more, but I found no documentation.
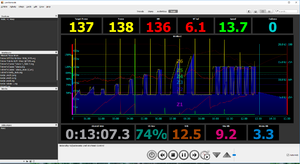
Golden Cheetah doesn't provide any kind of simulated world, but it does provide a wealth of data that they can display in real-time. You'll need an Ant+ USB adapter, but GC supports a wide variety of sensors.
Golden Cheetah stores the workouts in ERG files, which encodes the interval duration as fractional minutes to two decimal places. This means that durations of 20 seconds get converted to "0.33" which will get turned back to 19 seconds, which is rather frustrating. To avoid this, you'll need to use durations that are divisible by three seconds, so instead of 20 seconds, you'll need to set 18 or 21 seconds. If you see spikes in the power curve when using Golden Cheetah with a Kickr, it may be because you have the Kickr connected as multiple devices. You should connect the Kickr as just FE-C (Fitness Equipment Control) and leave both the speed and power sources as blank.
3.5 Tacx
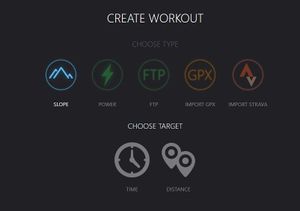
The Tacx software is available for Windows, Mac, iOS, and Android, but only supports Tacx trainers. It has a monthly subscription to get simulated rides that use real video footage rather than 3-D rendering, but a lot of the functionality is available without a subscription. The killer feature of the Tacx software for me is the ability to do slope by time.
3.6 Wahoo App
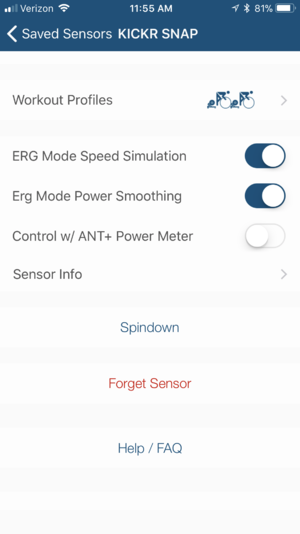
I expected the Wahoo app to provide all the basic functionality you'd need. Sadly, this is not the case. You can do some manual control of resistance, but there's no way of using it to run a predefined HIIT session. You do need to use the Wahoo app to calibrate the trainer (see above), plus there are a couple of options you can set only thought the app. You can configure the trainer to simulate a speed that is proportional to the power you're applying in ERG mode. By default, it will just report the actual speed of the wheel, and in ERG mode you can be moving very slowly with huge resistance. This setting is overridden by Zwift, which uses its own speed calculation based on power and the virtual slope you're virtually riding on.
3.7 Hurts Ergo
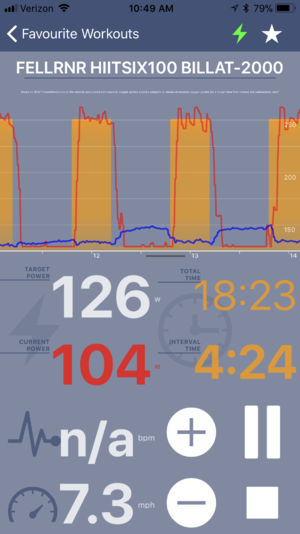
Hurts Ergo is a free, minimalist iOS app. You have to edit the HIIT workouts using [www.73summits.com/ergdb], which I found quite cumbersome and clunky. One problem for HIIT workouts is that you have to specify the duration in minutes, so 20 seconds is 0.333… minutes, which is unintuitive at best. The app itself doesn't work well, and I found that fractional minutes didn't always result in predictable interval lengths. So sometimes 0.33 minutes was 17 seconds, and sometimes 23 seconds, which is annoying. On the other hand, it's a simple, fairly easy to use app.
4 Other Equipment
You'll need a fan; probably several really big fans. Ideally, you want some way of turning the fans on while you're riding a bike. It can be chilly when you first start, but by the time you've warmed up, you'll want some air movement. Overheating can be a serious problem doing HIIT on a stationary bike. The biggest issue is the possibility of a sudden rise in core temperature that could lead to heatstroke. That's not common, but it's something to be aware of if you're new to HIIT. The more common problem is that to prevent overheating, your subconscious will reduce muscle recruitment well ahead of serious problems arising, so you may feel weak before you feel hot. One approach to cooling that I found helpful is to put a remote-control adapter onto my box fans. This is much cheaper than buying a fan with a remote control, and also makes it easier to control up to 5 fans from one remote. I got the Etekcity Five Pack Remote Control which has 2 remote controls, and 5 power adapters. This allows me to start working out without any air movement, and gradually increase the number of fans as a warm-up.
Having some water handy is also a good idea. You're unlikely to dehydrate much during a short HIIT session, but I find the heavy breathing tends to try my throat out. Chewing on a mint can help a little by getting the saliva flowing, as saliva is far more lubricating than water.
5 My Training Setup
Here are some pictures of my setup, along with the notes.
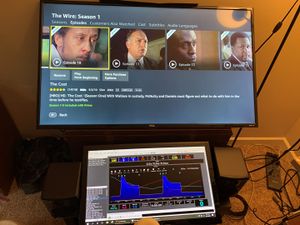
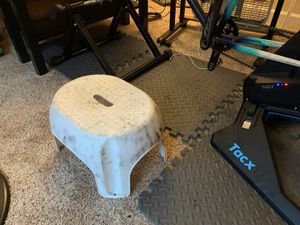
this overview shows the layout, with a big TV and monitor in front of me, and two laptops to the side. I have some old, cheap gym flooring to catch the sweat. You will notice that the TV monitor is angled upwards, which makes them at right angles to my vision in my natural cycling position. This prevents neck strain while training. Getting sweat on the lower monitor is an issue, but it's a very old monitor, so I'm happy just to wipe it dry after the workout.
I have one laptop for entertainment, even though the TV has built-in Netflix and Amazon Prime. That's mostly so I can watch coursera.org lectures and YouTube videos while I'm training. The other laptop runs my training software, currently a heavily customized version of Golden Cheetah. One note is that I originally had a low powered laptop for the entertainment and a more powerful one for the training software, but I found video playback needed more GPU power and I had to swap them over.
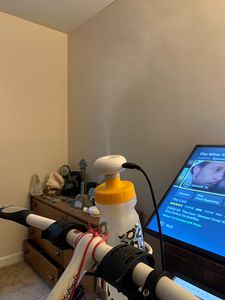
I have a cheap humidifier that blows the moist air onto my face, as I find during intense interval training my throat will dry out and I will end up with a hacking cough. I mounted this in an old water bottle with the top cut open. The one I ordered is https://amzn.to/2J9dG94 though there are several similar personal humidifiers.
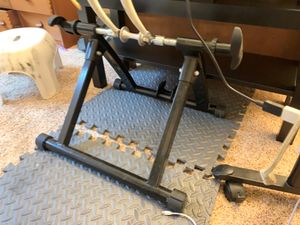
Bike trainers typically come with a small platform to raise your front wheel, which works well enough, but I had two problems with that approach. The first is that it didn't feel quite stable enough when I was at really high intensities. For instance, during a 3AOT workout the low oxygen saturation can make me a little dizzy. The second problem is that having the front wheel on the bike means that my lower monitor was too far forward for comfort. I solved this problem by getting a wheel-on trainer and using simply to mount the front wheel. I removed the resistance mechanism, which obviously I didn't need. One problem I hit was that the front hub is narrower than the rear hub, but this particular trainer went narrow enough. The train I got is no longer available, but it's still listed on Amazon at https://amzn.to/3djuNmg(I paid about $50, and there are other similar trainers for roughly similar prices.)
6 What Watts?
Cyclists have been using the power meters of the years, and have several terms that are likely to be unfamiliar to runners.
- FTP. This is "Functional Threshold Power" and is the maximum power that can be sustained for an hour. Cyclists used this rather like a runner would use their "5K pace", though cyclists often use percentages of FTP. (FTP is a trademark of Training Peaks.)
- CP. Critical Power is the power that can be maintained 'indefinitely' or for a 'very long time without fatigue'[1], though this has been redefined so "indefinitely" is ~30-minutes[2]. CP is generally between Lactate Threshold and V̇O2max.
- Power Curve. If you measure your CP for different durations you build up a curve, which is sometimes called the power curve or power-duration curve.
- Power at V̇O2max. This is one that cyclists may not refer to usually but it is a common intensity for HIIT workouts used in scientific research. For instance, the well-known Tabata workout is performed at 170% of the power at V̇O2max.
- W′. Pronounced "double-u prime", can be thought of as a measure of anaerobic capacity[3]. It's the work that can be performed above CP, in Joules. W' is the shape of the power-duration curve. W' can be used to estimate the point of failure for anaerobic exercise, something that Golden Cheetah will visualize for you. So exercise above CP will result in a depletion of W', and when W' hits zero, you should be unable to continue (or at least, only continue at your critical power.)
7 Estimating Power At V̇O2max From Running Performance
If you're a runner, there's a good chance you'll have no idea where to start in setting up a power-based workout. I did a little research on the topic, and based on nine studies I found that you can get a rough estimate of power at V̇O2max from V̇O2max which in turn you can estimate from your running performance. I refined that formula based on a study of 1,715 subjects that I found later[4].
- The first step is to estimate your V̇O2max, which you can do using my Running Calculator (or anybody else's as there are lots on the Internet.) You'll need to enter a recent race performance, though you could use a 5K time trial from training. For instance, a three-hour marathon represents a V̇O2max of 54. (Cycling V̇O2max is likely to be a little different to your running value, but it's good enough for this estimate.)
- There is a relationship between V̇O2max and power at V̇O2max which varies based on sex.
- Example, for my V̇O2max of 63, is ((63-7)/10.791), or 5.19 Watts/Kg. Multiplied by my weight in kilograms to get total power. Multiplying 5.19 Watts/Kg by 63 Kg gives 320 Watts.
This gives a starting point for HIIT. While it's tempting to aim for interval intensities above your power at V̇O2max, I'd strongly suggest you start somewhat lower and build up. You can build up the intensity either over several sessions, or have increasing intensity intervals during a single workout. You'll also find that as you get used to the cycling, the power you can output will increase quite a bit.
8 Estimating Power At V̇O2max From Submaximal Incremental Test
If you know your [Maximum Heart Rate]] from a running test, you can perform a submaximal incremental test on the bike to estimate your Power at V̇O2max. Knowing your maximum heart rate requires a stress test, as it cannot be calculated! But, if you do happen to know your maximum heart rate, perhaps from a running V̇O2max test, or perhaps from a finishing kick during a short race, this is another approach to consider. Simply warm-up, and then perform an incremental test, recording your heart rate. Make sure you don't get hot, as this will skew the results. I use five steps going from 150w to 350w in 50w increments. The steps need to be long enough for your heart rate to stabilize, and you take the average heart rate from the last section of each step. For instance, my results were 150w/137, 200w/144, 250w/155, 300w/166, 350/169. Plotting that in Excel gives an R2 value of 0.98. This predicts my power at V̇O2max to be about 455w, which is close to the calculation above.
9 Measuring Power At V̇O2max
The best solution is obviously to perform a V̇O2max test. If you're going to go through the pain and suffering of the maximal incremental stress test, then I'd recommend doing it at a lamp where they can measure your oxygen consumption. You could do a similar test at home with a cycling trainer, but you won't know your oxygen consumption unless you have the budget for lab great gear. Getting the incremental steps right seems to be a bit of a dark art. Typically the steps are 60 seconds long and aim to produce exhaustion in 3-6 minutes. The increments need to be coarse enough to produce voluntary exhaustion, while fine enough to give a reasonable precision. I've seen increments of 25w used in research papers. You'll know when you've hit V̇O2max when the power increases, but your heart rate does not. This deflection is considered the definition of V̇O2max, where work increases but oxygen consumption does not. Note that it's estimated that half of all subjects never demonstrate the heart rate/oxygen consumption deflection that's part of the definition of V̇O2max.
10 References
- Jump up ↑ DW. Hill, The critical power concept. A review., Sports Med, volume 16, issue 4, pages 237-54, Oct 1993, PMID 8248682
- Jump up ↑ David C. Poole, Mark Burnley, Anni Vanhatalo, Harry B. Rossiter, Andrew M. Jones, Critical Power, Medicine & Science in Sports & Exercise, volume 48, issue 11, 2016, pages 2320–2334, ISSN 0195-9131, doi 10.1249/MSS.0000000000000939
- Jump up ↑ Toshio Moritani, Akira Nagata, Herrfrt A. Devries, Masuo Muro, Critical power as a measure of physical work capacity and anaerobic threshold, Ergonomics, volume 24, issue 5, 2007, pages 339–350, ISSN 0014-0139, doi 10.1080/00140138108924856
- Jump up ↑ Christina G. de Souza e Silva, Claudio Gil S. Araújo, Sex-Specific Equations to Estimate Maximum Oxygen Uptake in Cycle Ergometry, Arquivos Brasileiros de Cardiologia, 2015, ISSN 0066-782X, doi 10.5935/abc.20150089
